Hardwiring a Dashcam Properly
Preamble
A month or so ago, I was involved in a minor accident involving me and a telegraph pole lorry. Nothing major, but it did cause a fair bit of damage to my car.
Unfortunately, the lorry driver apparently decided that I was not worth worrying about, and refused to stop. Despite getting his registration, and enduring numerous calls to the Police and insurers, with only my word against his it became clear that I was never going to get anywhere with a claim.
Personally I would have thought that leaving the scene of an accident was enough of a crime to stand alone regardless of who or what was at fault. But I digress.
The end of the story is that I decided to buy and install a good quality dashcam, so that in the (hopefully) unlikely event of future collisions I can at least have evidence of exactly what happened.
The Viofo A139
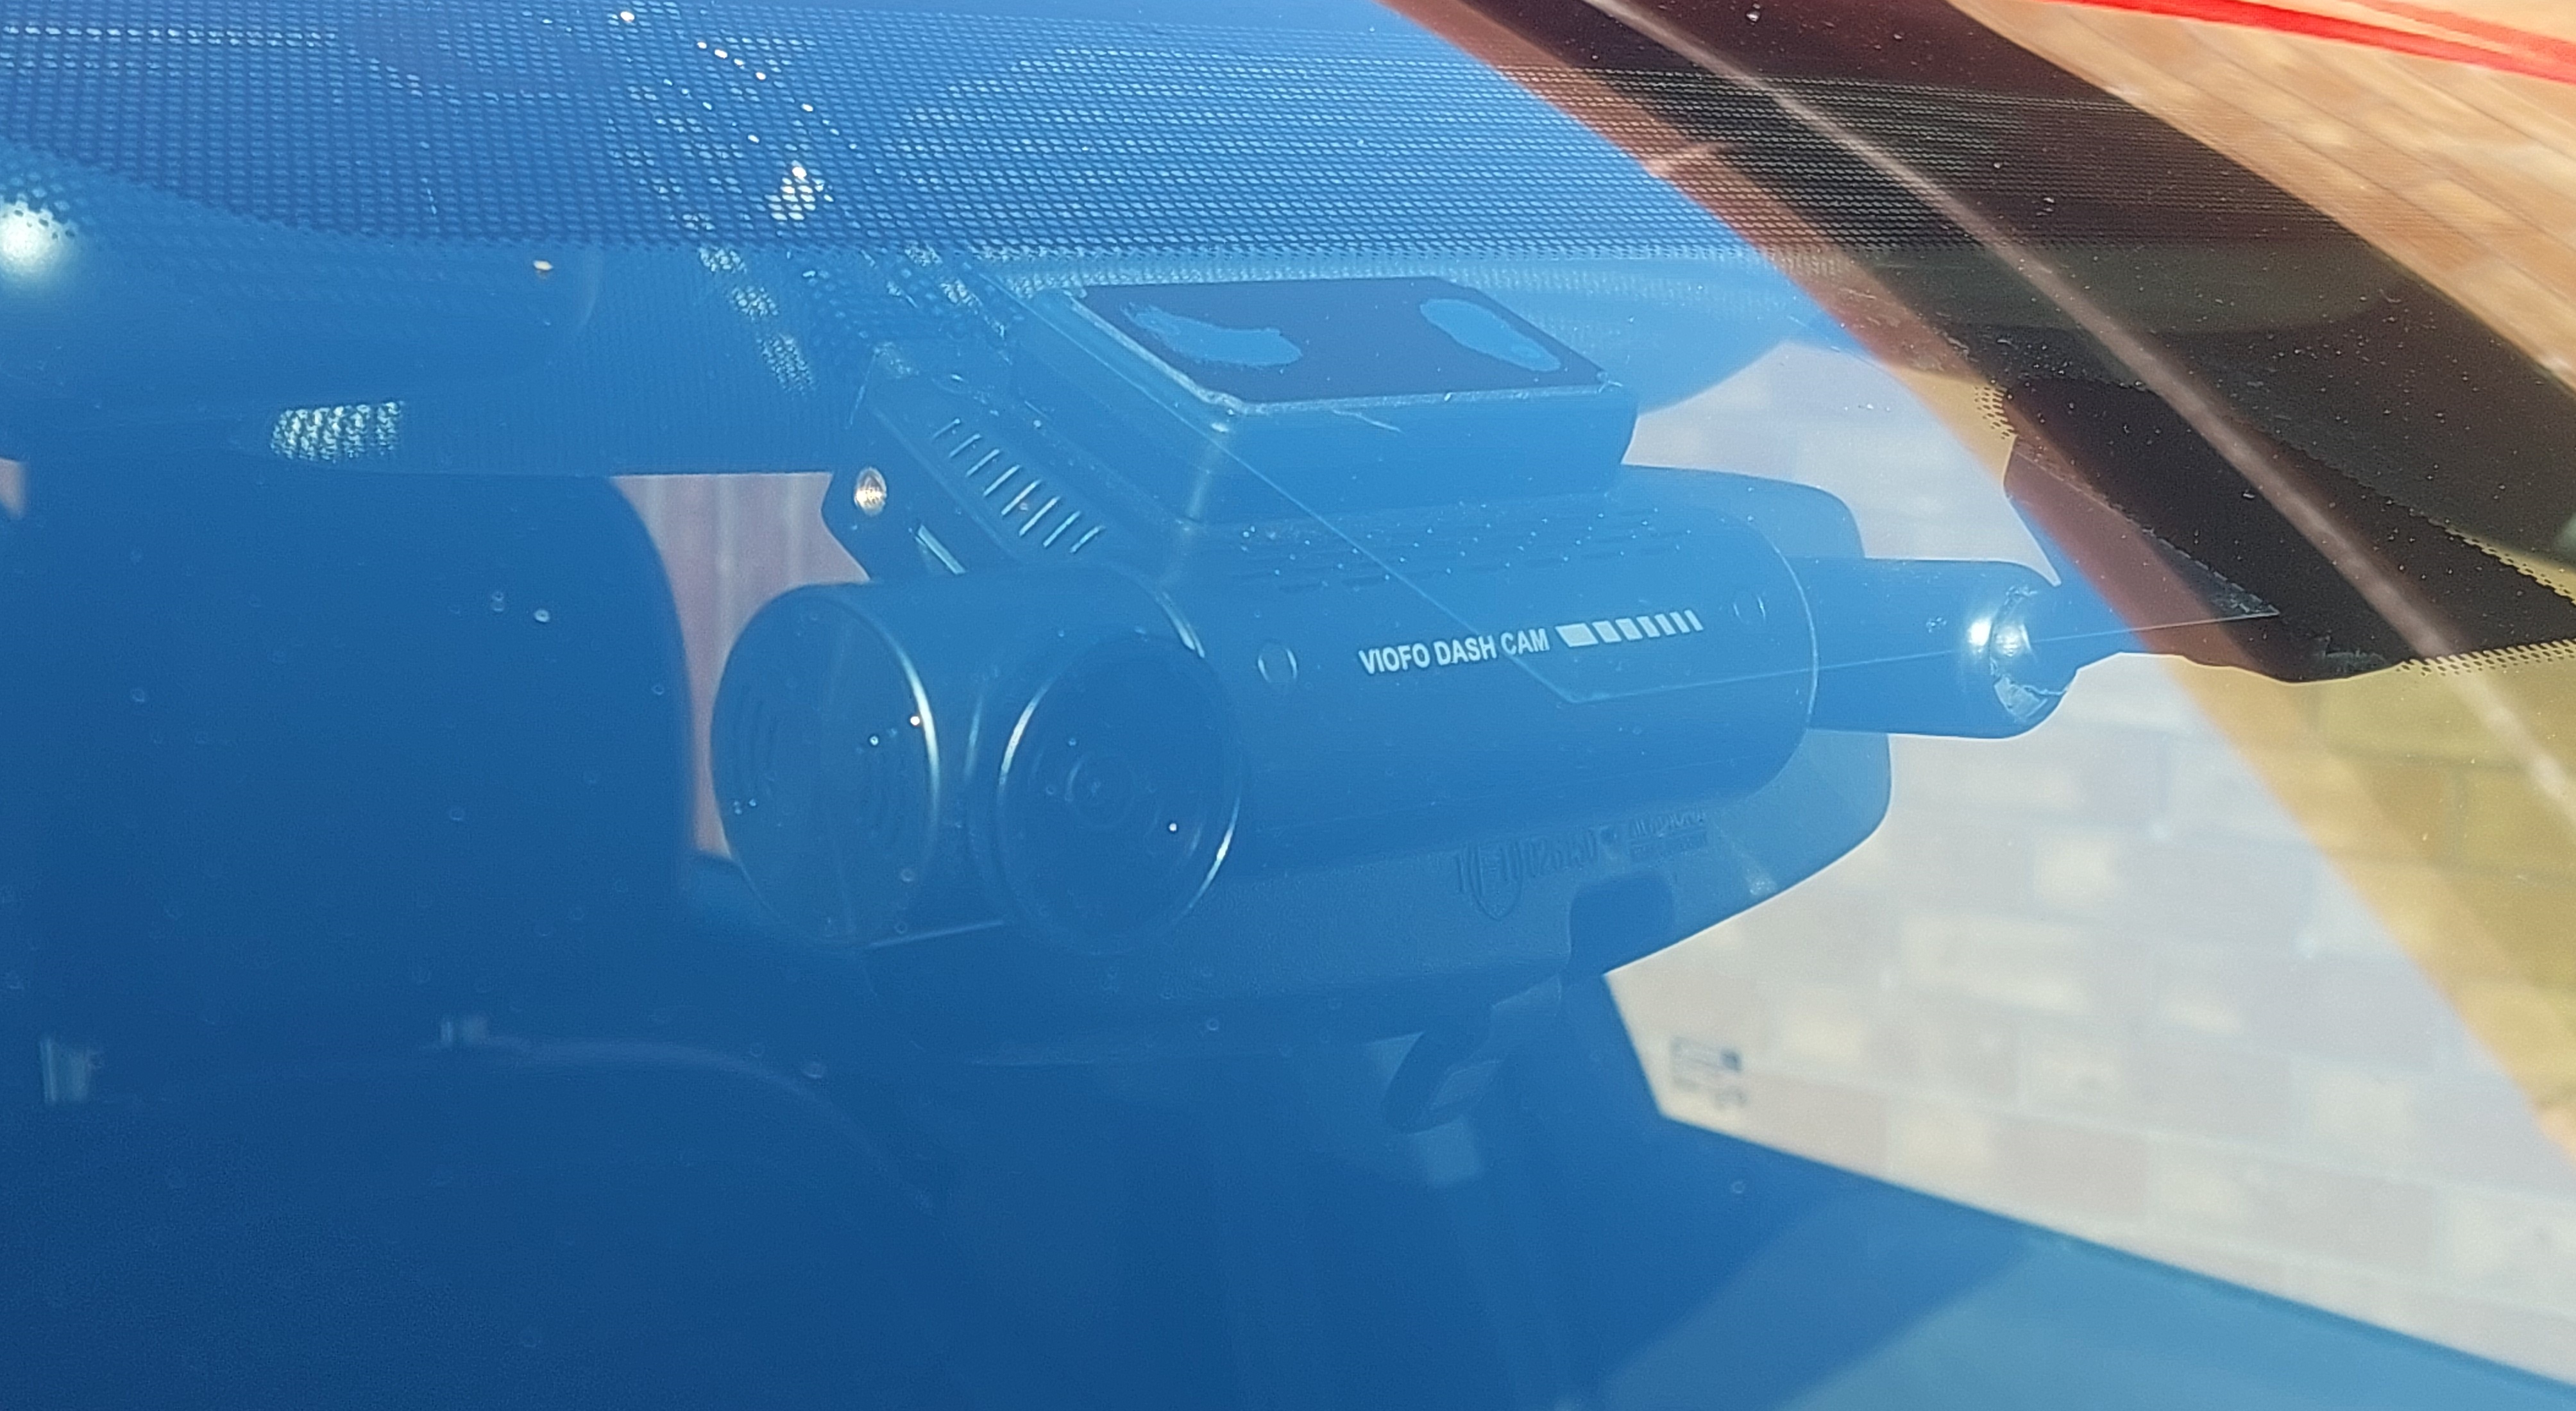
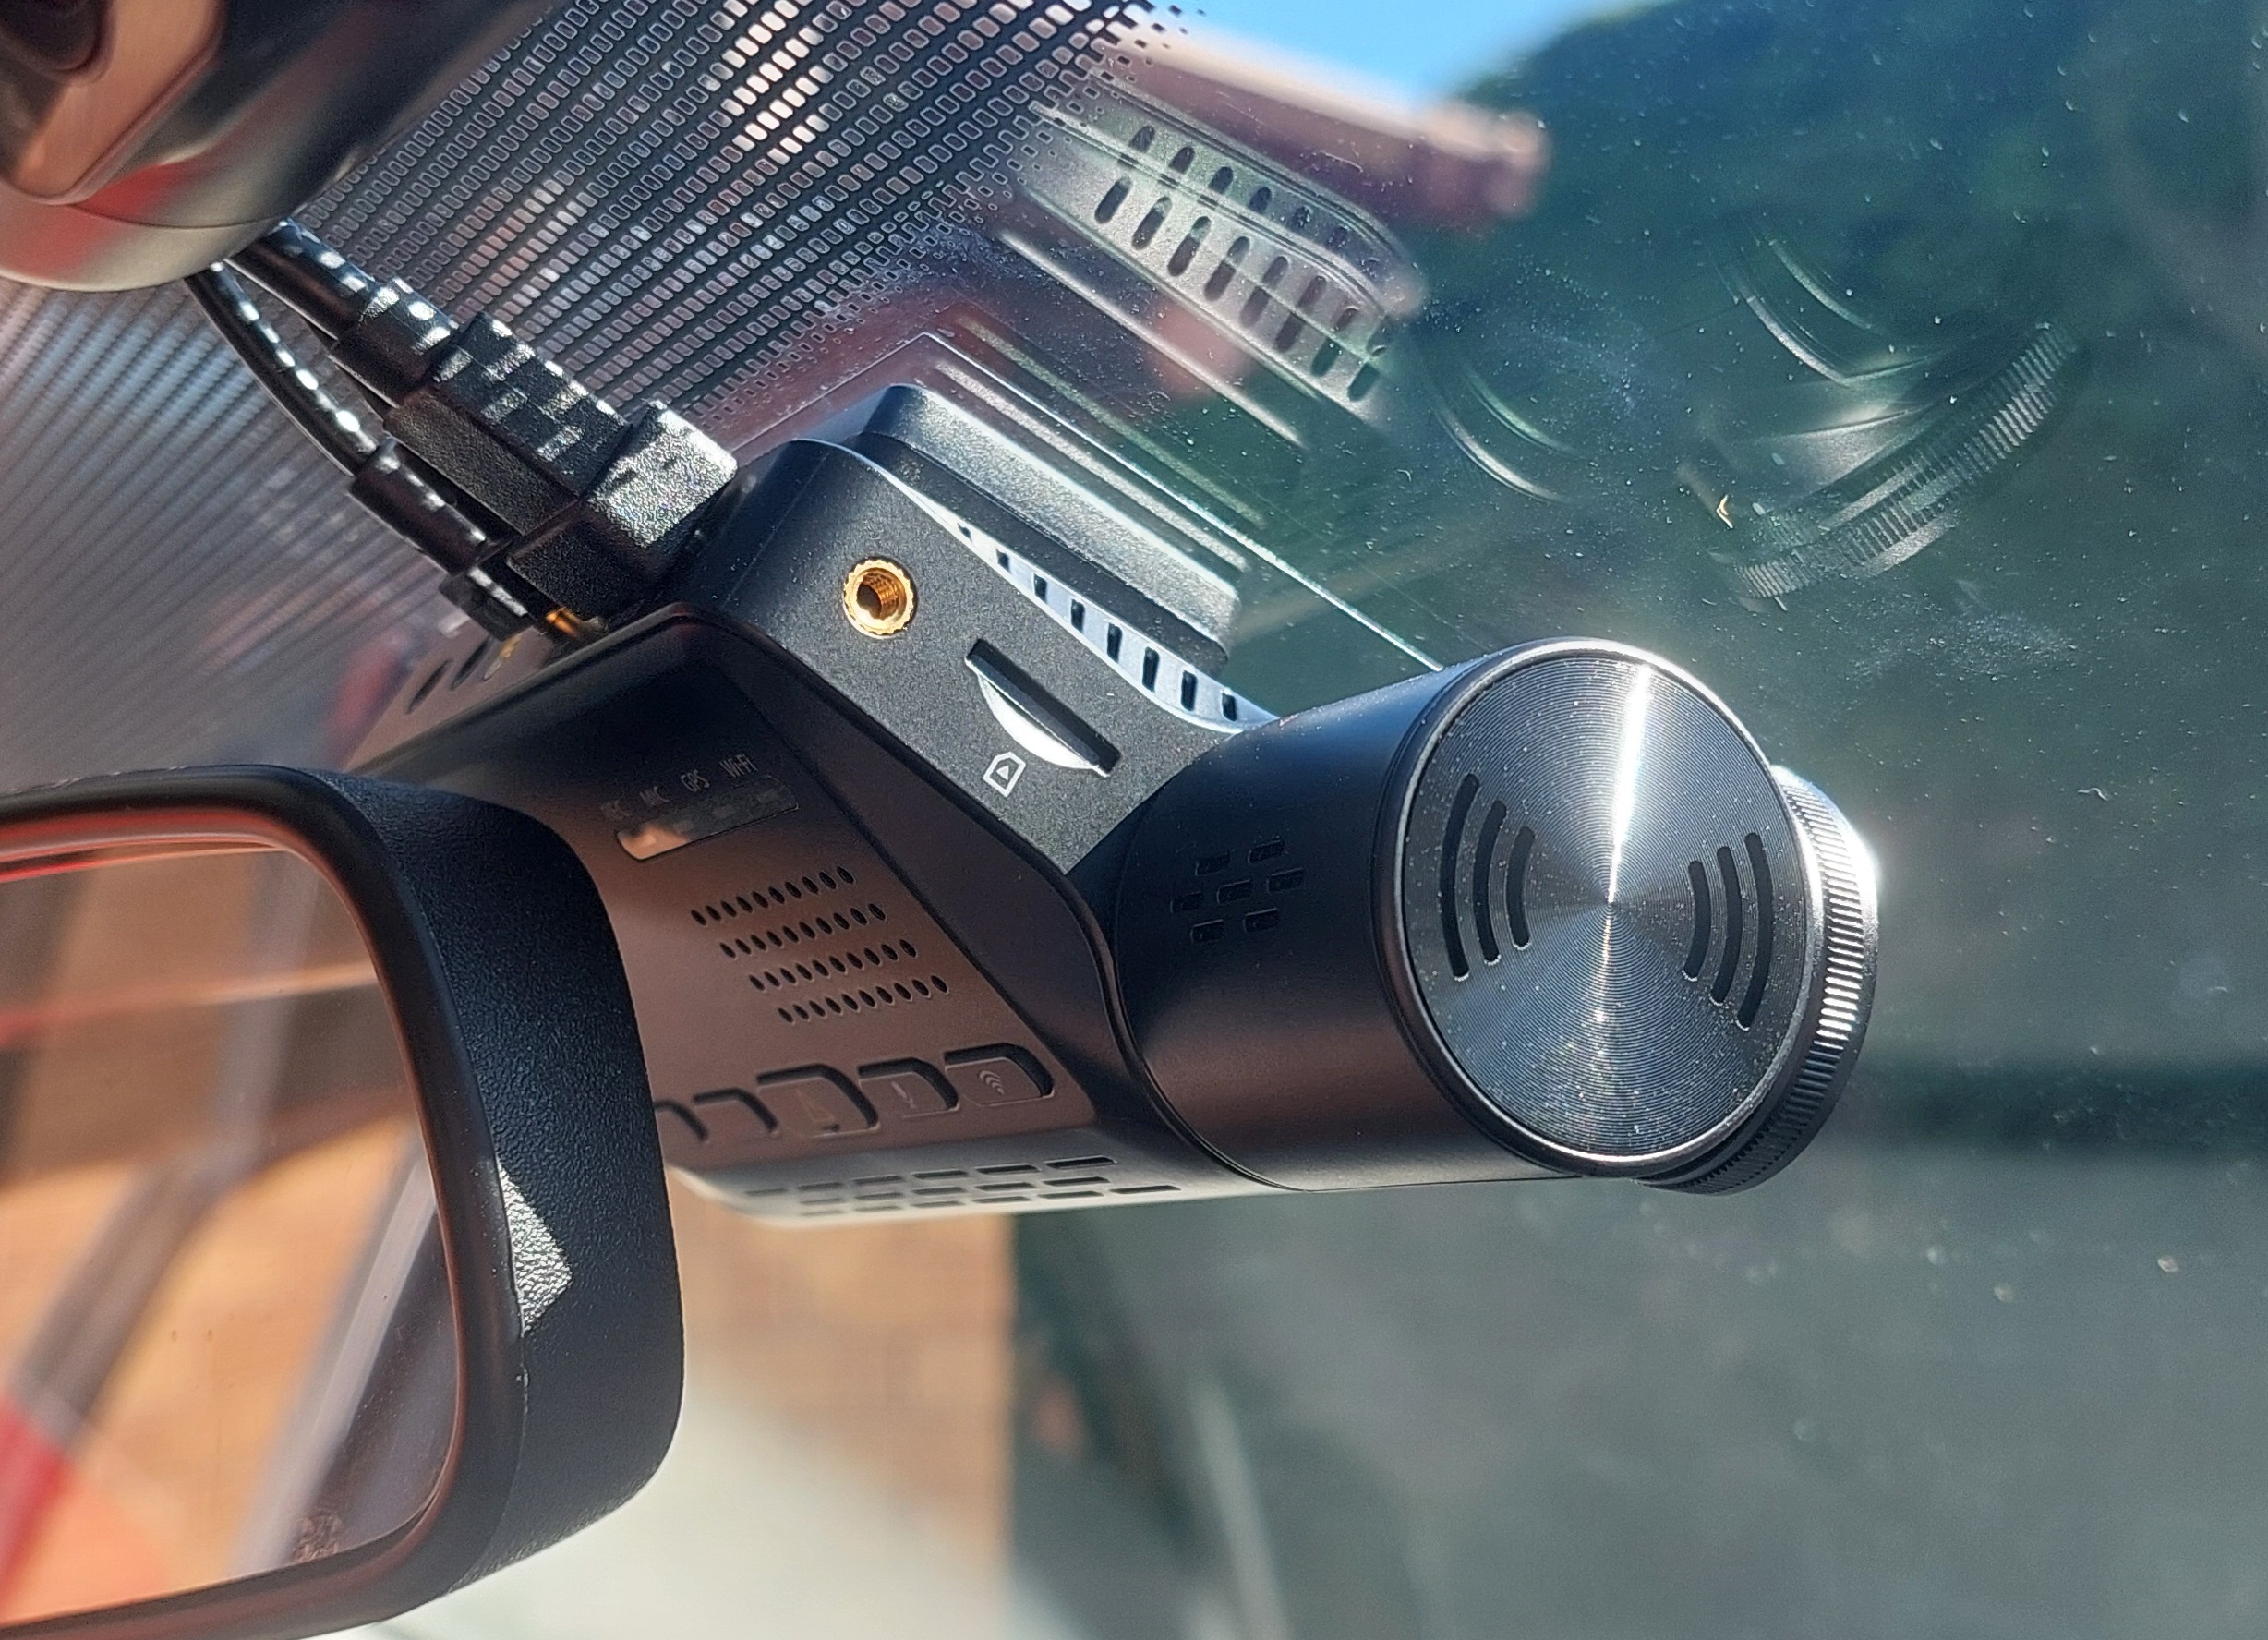
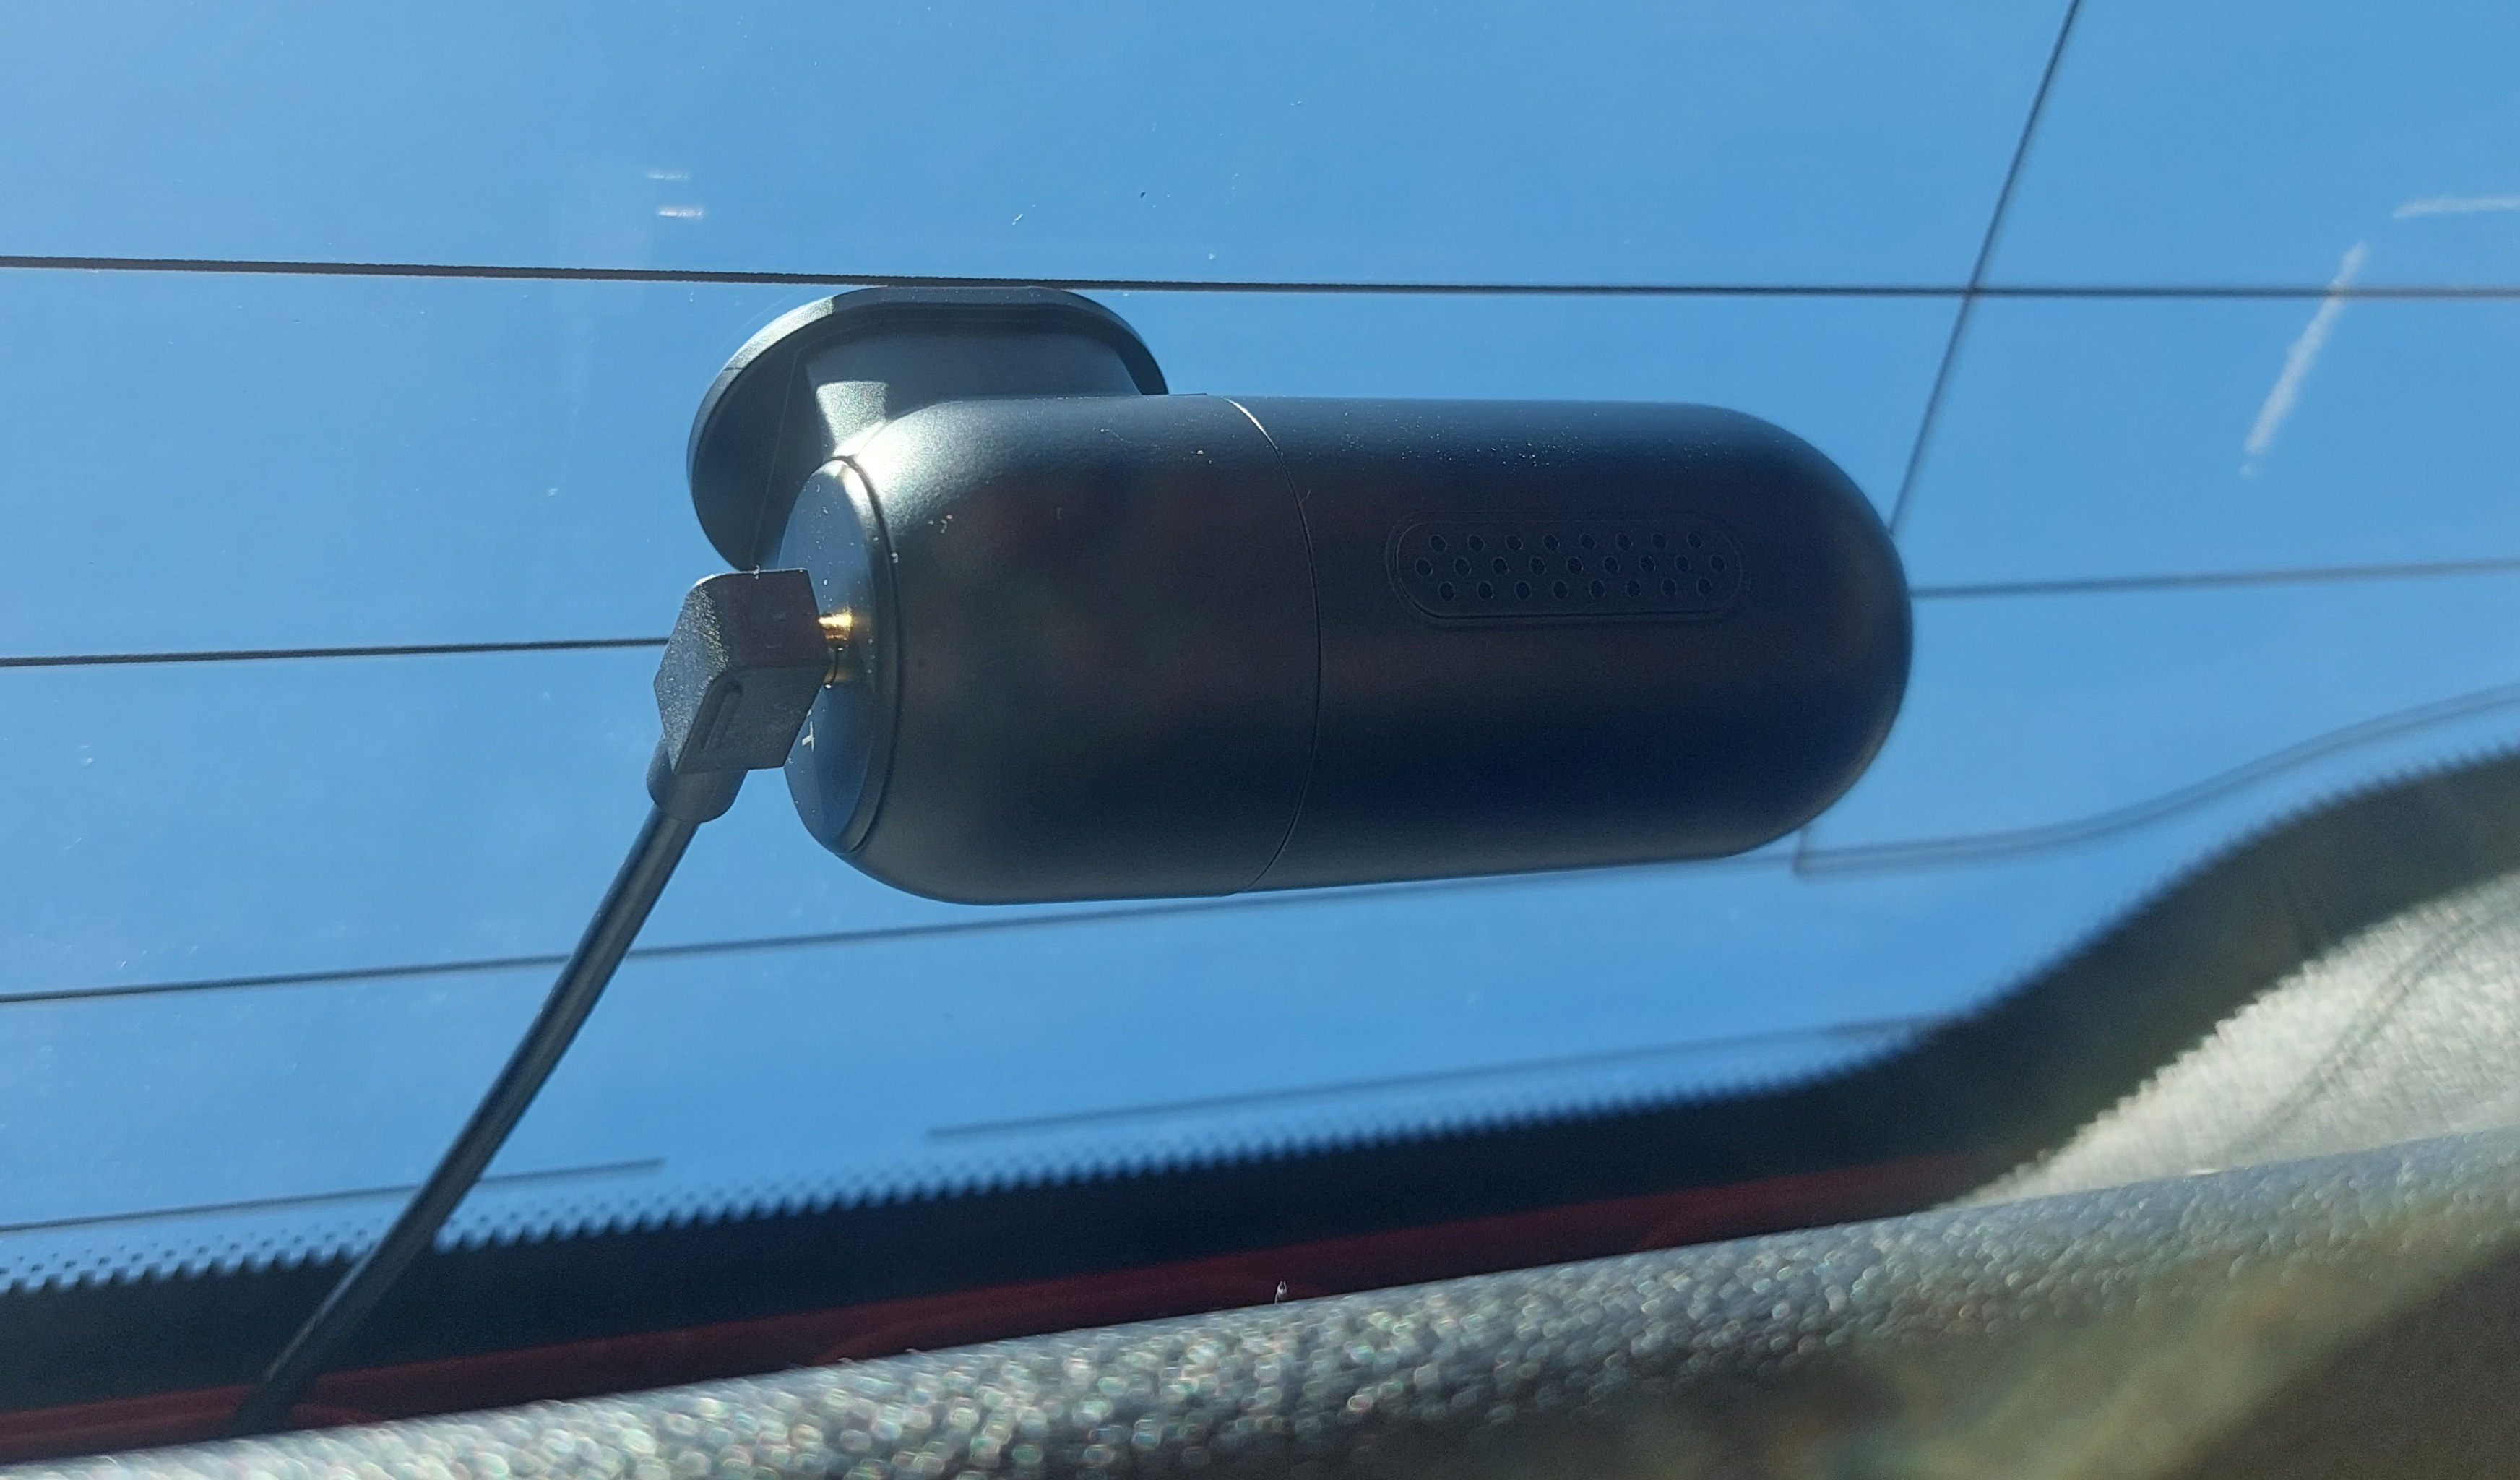
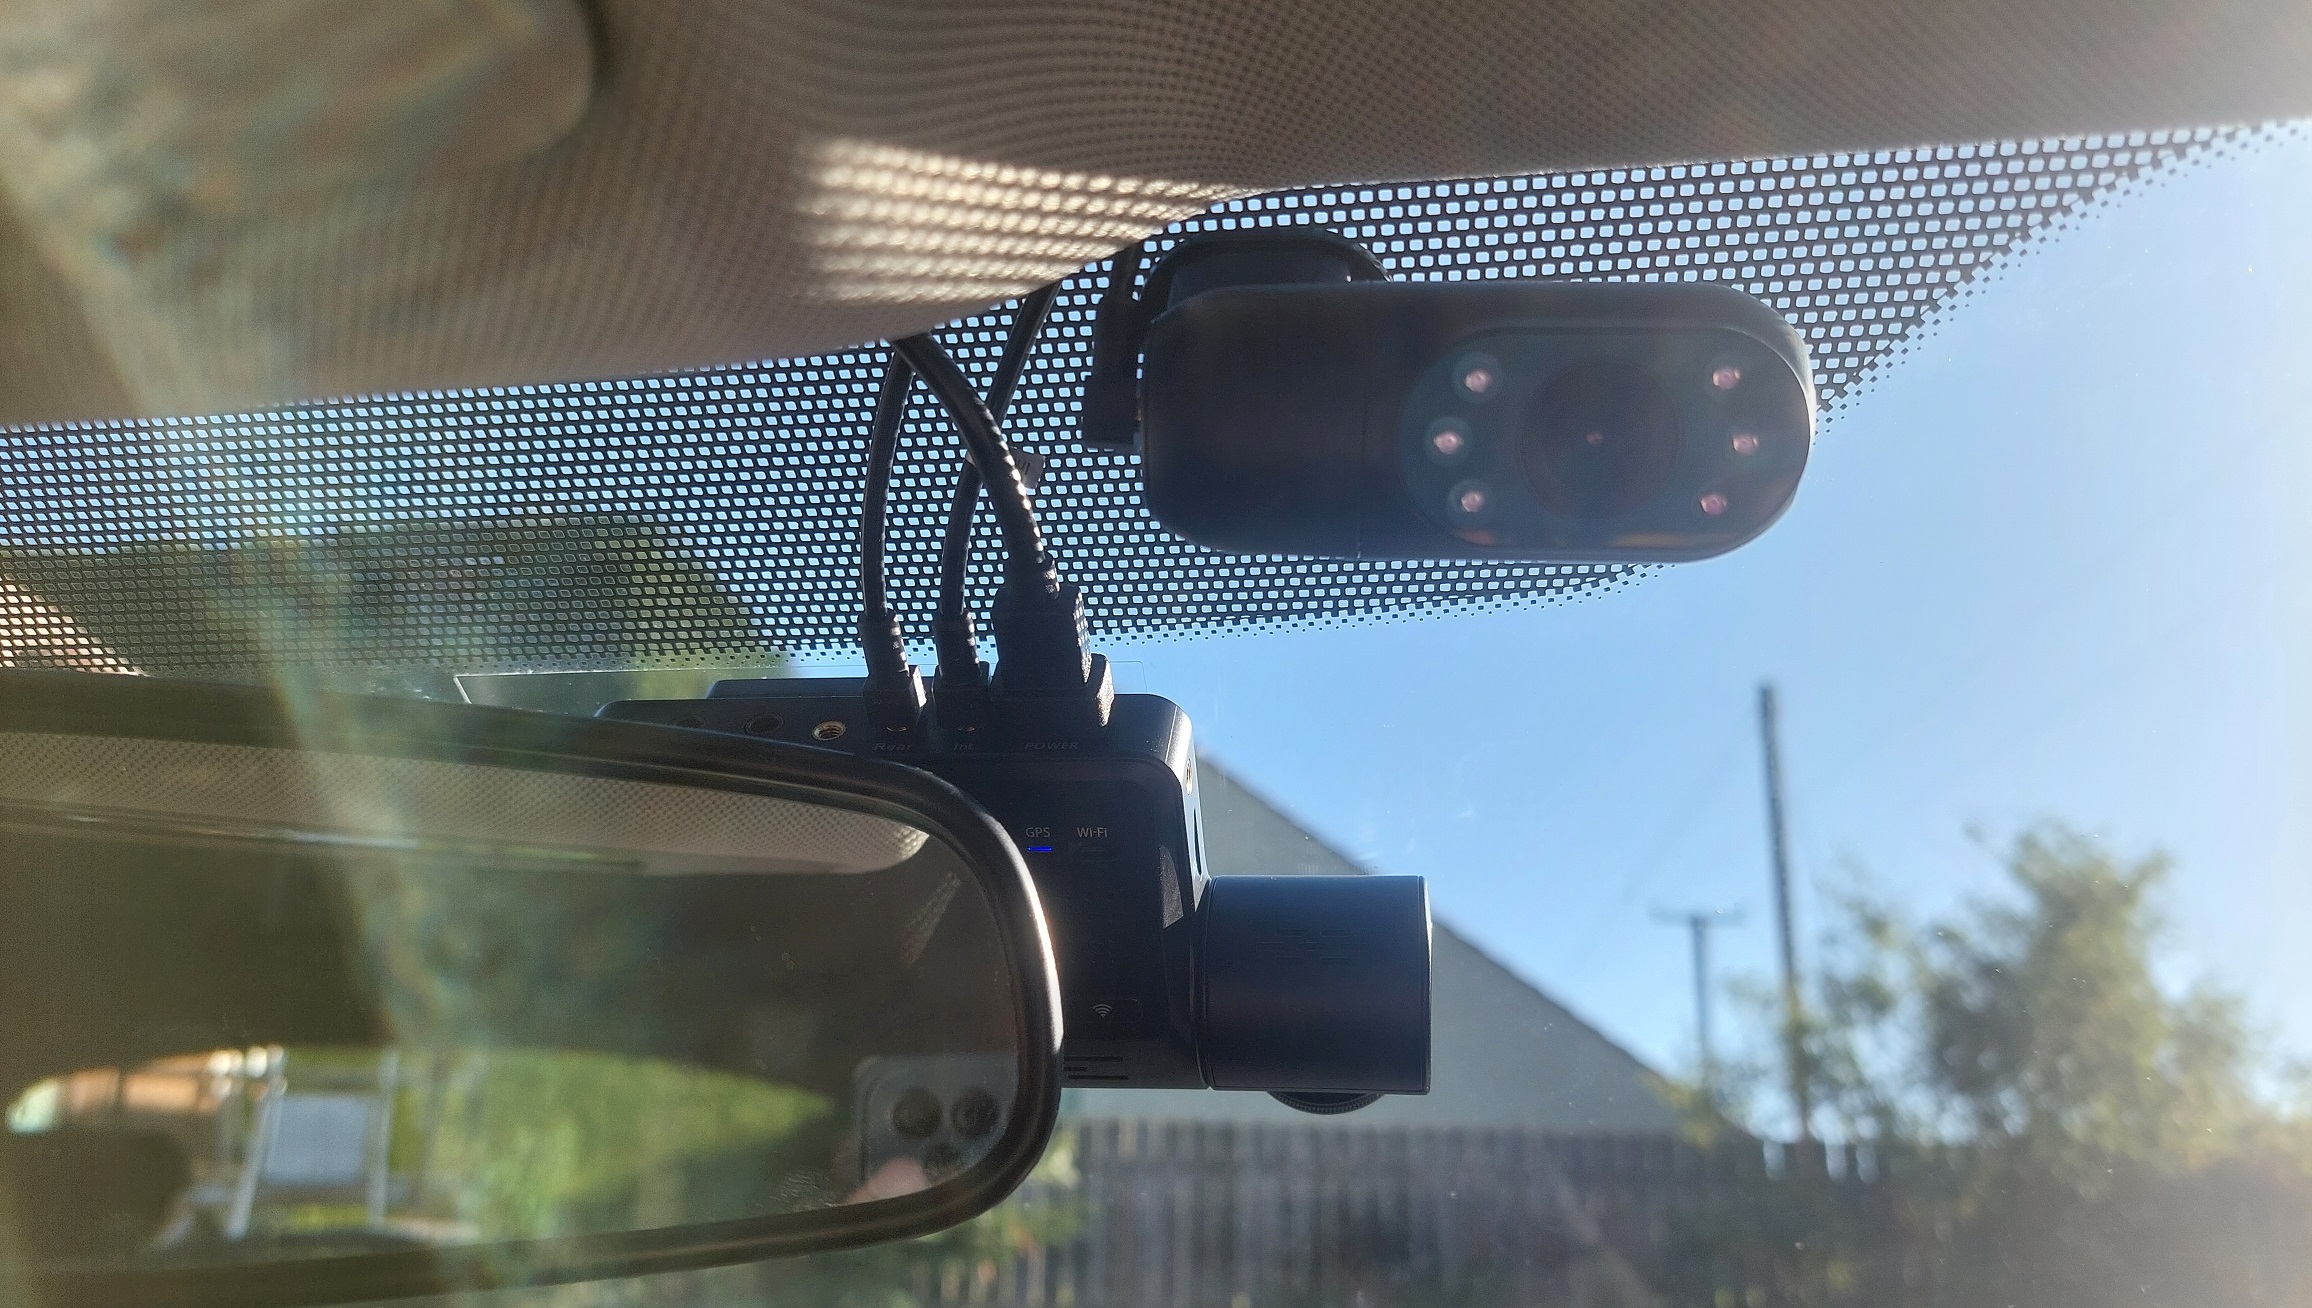
After a bit of research and recommendations from folks online, I decided to buy the Viofo A139. This is actually a three channel dashcam, so in addition to the main unit in the front windscreen it comes with two small cameras connected via miniature coax cables, which simulataneously record a rear view and what's going on inside the car.
I have to admit I'm not a huge fan of having a camera staring at me all the time while driving, but I decided to fit it simply because it would provide proof I wasn't staring at my phone during an accident, for example.
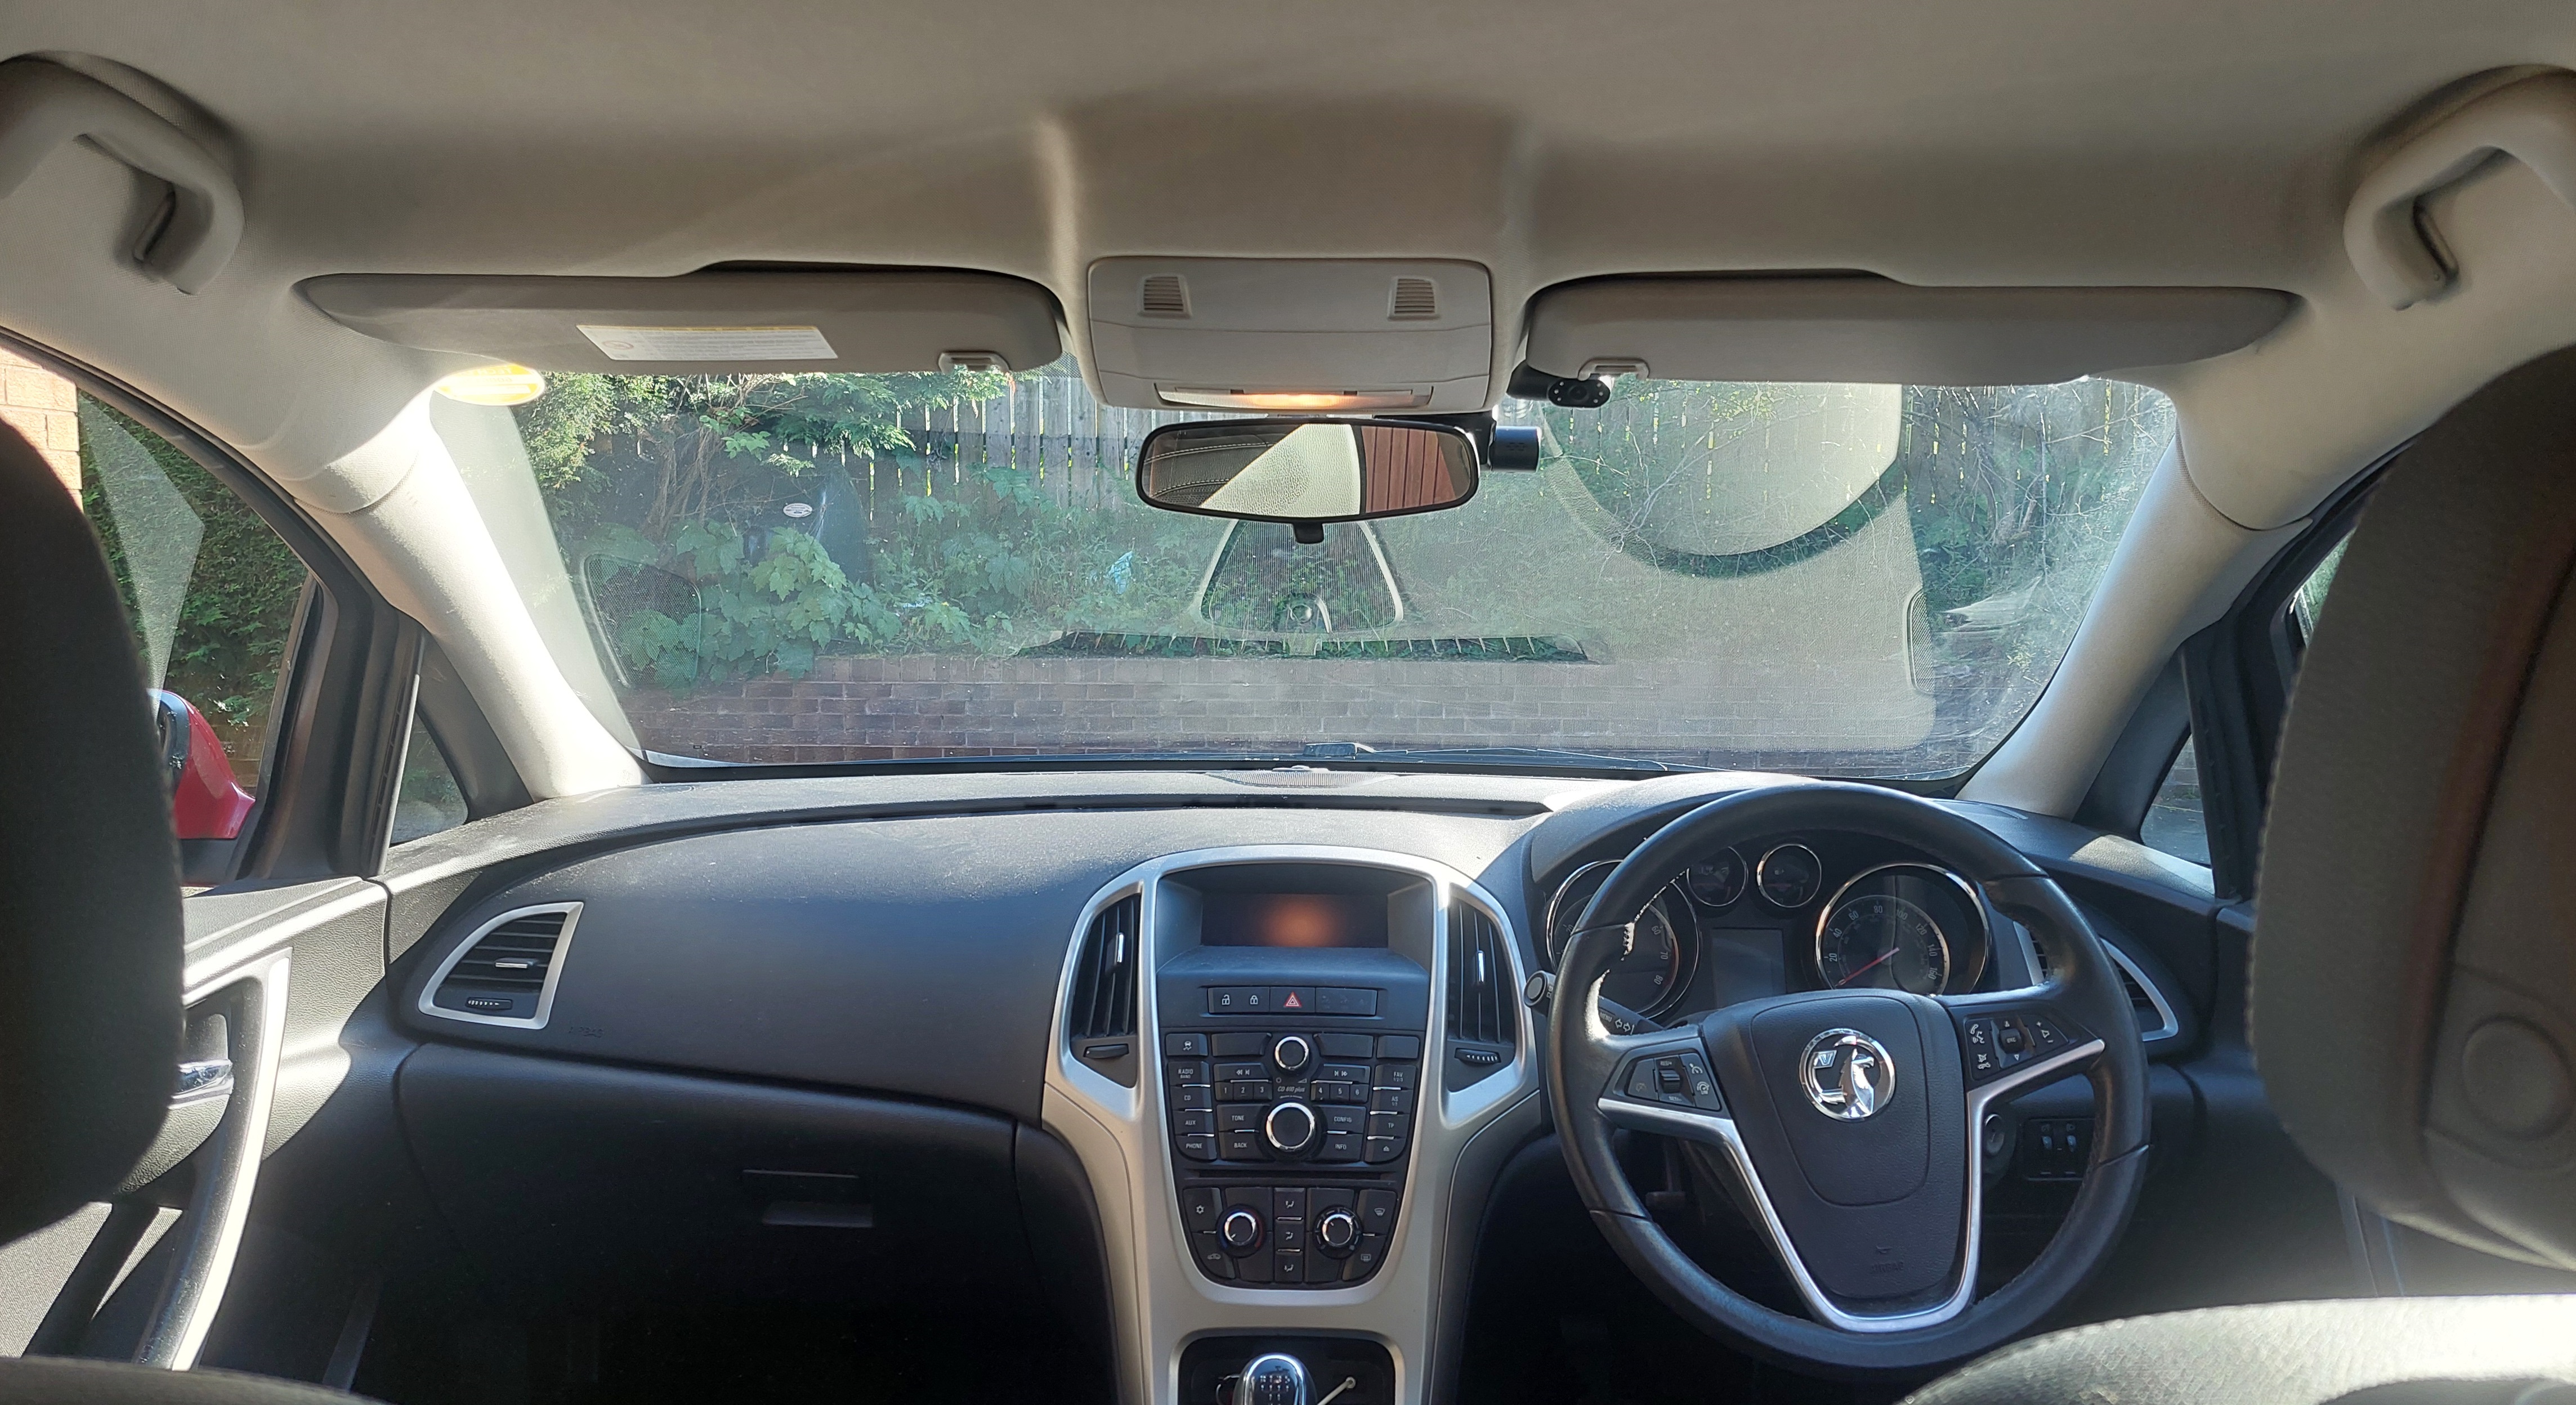
Anyway, I decided to fit the main camera just behind the rear-view mirror. I chose a spot that was cleared by the windscreen wipers, but tucked in behind the mirror where it's not obscuring the view any more than necessary.
Now, the first problem was the rear camera. You see, I drive a hatch-back, so the cable running to the rear window would need lots of slack to accomadate the tailgate's movement. I hate the idea of wires hanging around in my car, so a bit of consideration would be required.
Fortunately, since there are lights mounted on the tailgate, the cables for those run through flexible tubes and into the ceiling area. I figured that I could sneak my mini coax down one of those too.
Now, the snag with this terrific stroke of genius was it would require access to the ceiling, which meant removing the head-liner. I have to admit I might not have done the most terrific job of that. I opted to just remove some of the nearby trim pieces, and force the headliner out of the way - which left a few creases. Fortuntely they aren't particularly obvious, and in a spot behind the rear passenger seats that I'm certainly not going to be staring at all the time.
Editor's Note: I went back after I wrote this to take some pictures of the damage, and have been unable to find it. So either they were nowhere near as bad as I thought, or they've reformed after a day or two. Probably some combination of the two.
To fetch the cable from the rear back to the front, I employed my trusty flat-steel "fish tape". I had a few false starts where it got caught on cross-members in the roof, but ultimately it got the job done, and before long I had the coax plugged into the front unit!
Power
This is where I might have went a bit mad.
One of my pet hates when seeing other folks fit aftermarket electrical equipment in cars like this is bodge jobs. You know exactly what I mean. Ugly cables running across the dash into the fag-lighter socket - or wiring into the loom with those horrible splicing crimp connectors - or using piggyback fuse adapters, usually with a liberal application of gooey, sticky insulating tape!
I even found some of these sins inside my car, from a previous owner, and couldn't do anything without splicing in whole lengths of cable, since they were now too tight to re-do properly.
I vowed that I would not have such horrors attached to my name. So when I bought the camera, I also bought the "hardwire kit". This is essentially a long USB-C cable that breaks out to three wires. The idea is that the red and black wires connect up to the battery as you'd expect, and the yellow wire to a source that comes on with the ignition.
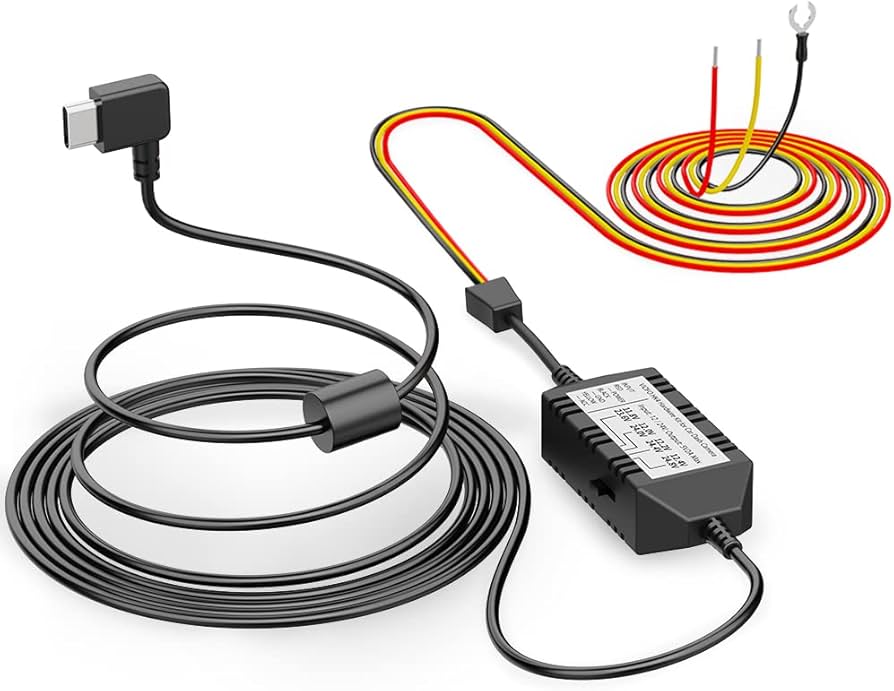
Viofo don't really give much instruction on how they expect you to wire it, but I had ideas forming. To start with, I removed the left-side A-piller trim cover, and routed the long USB-C cable through it and up to the camera via the ceiling.
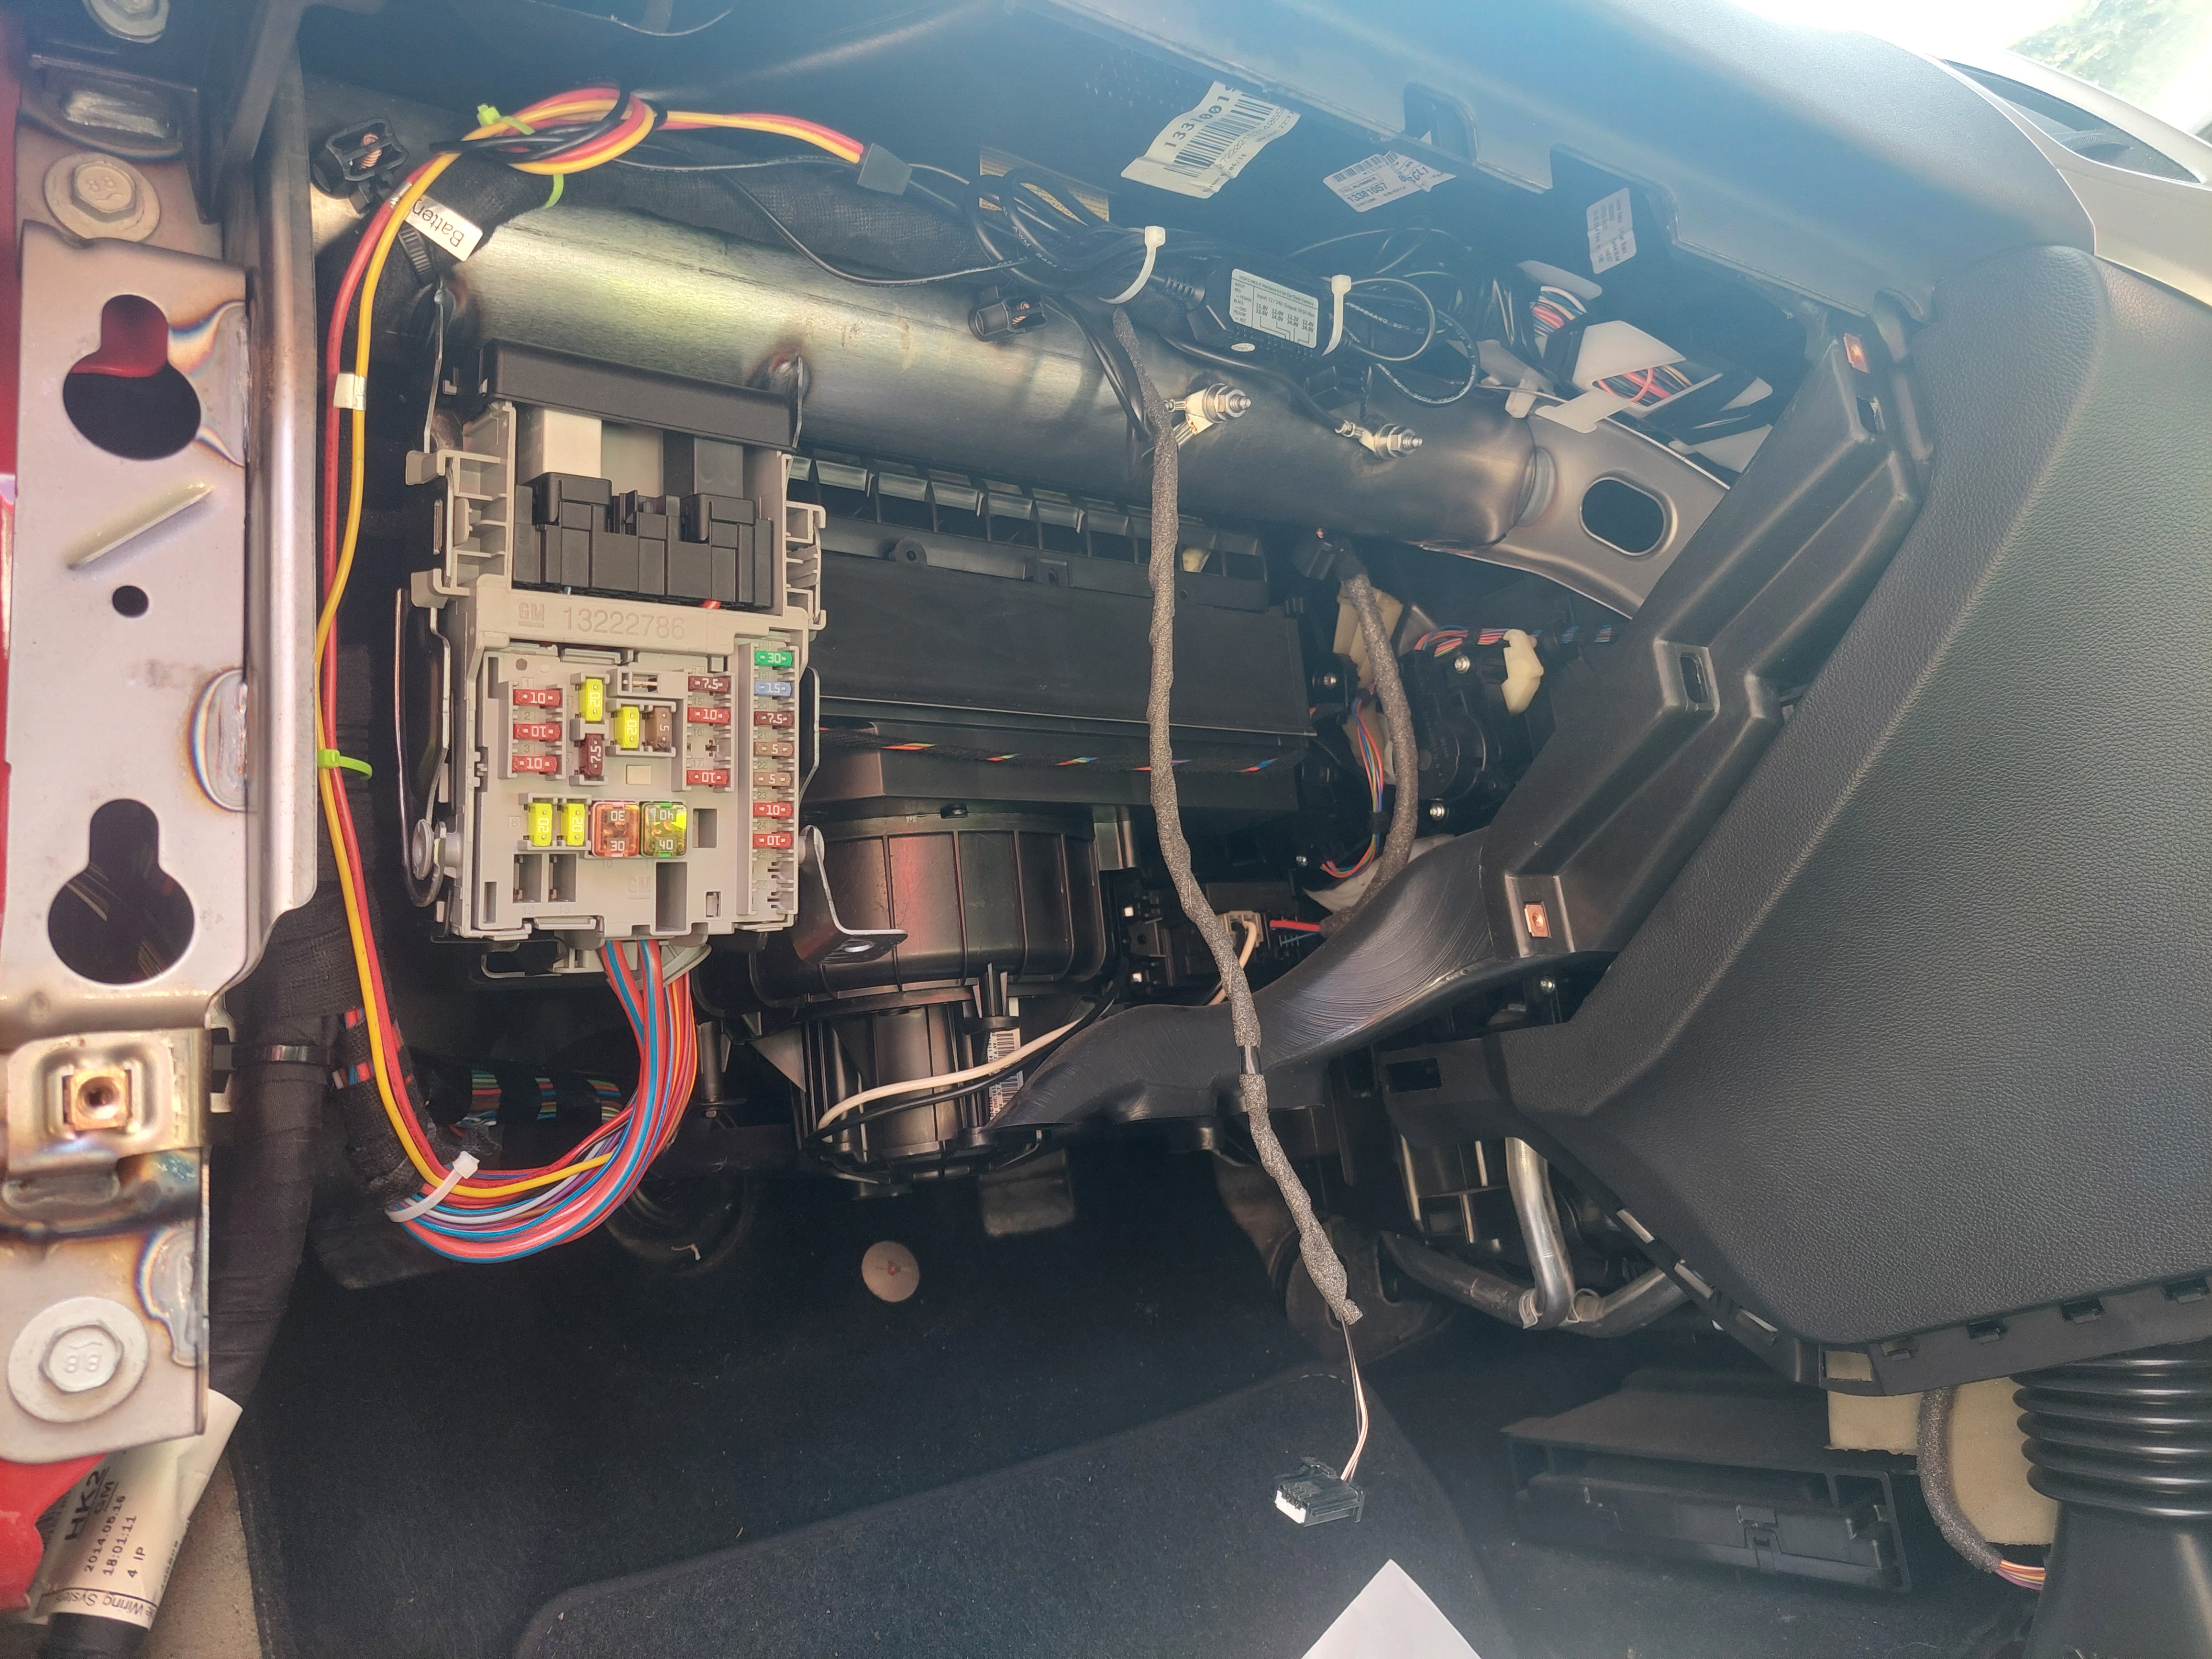
This left the breakout wires hanging conveniently beside the under-dashboard fuse box.
My plan was to find a few spare fuse positions, and wire my camera directly into the box as though it was always meant to be there.
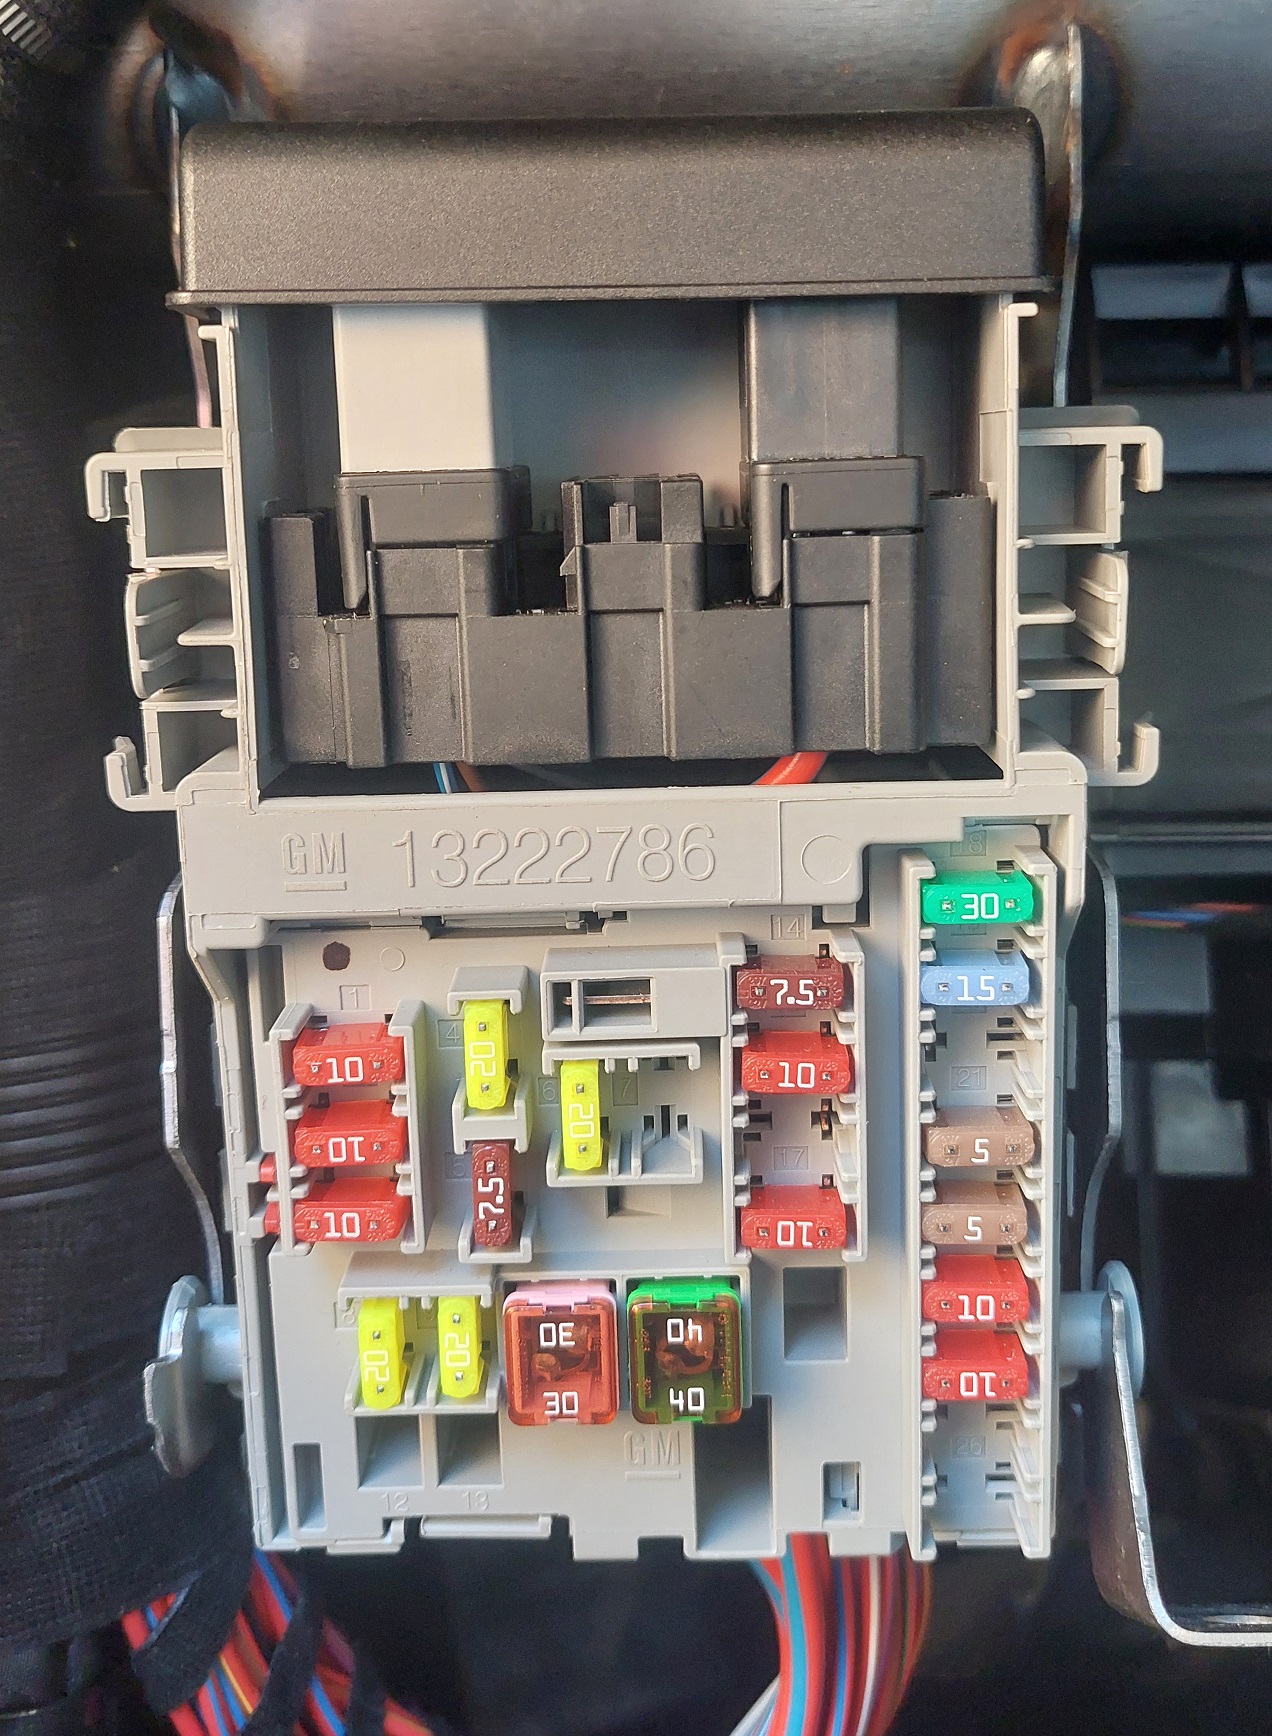
Snag #1: GM in their infinite wisdom don't waste money fitting the contacts into positions that aren't intended to ever be used. So I would need to source a few of these contacts and fit them.
Fortunately, this was no problem. I went onto eBay, as one does, looking for "contacts for GM fusebox" - and discovered that while I could buy a contact (singular) for £25, from a questionable source with no pictures... Or, I could buy the entire fusebox, complete with fuses and relays, for £6.
No prizes, then, for guessing which option I picked.
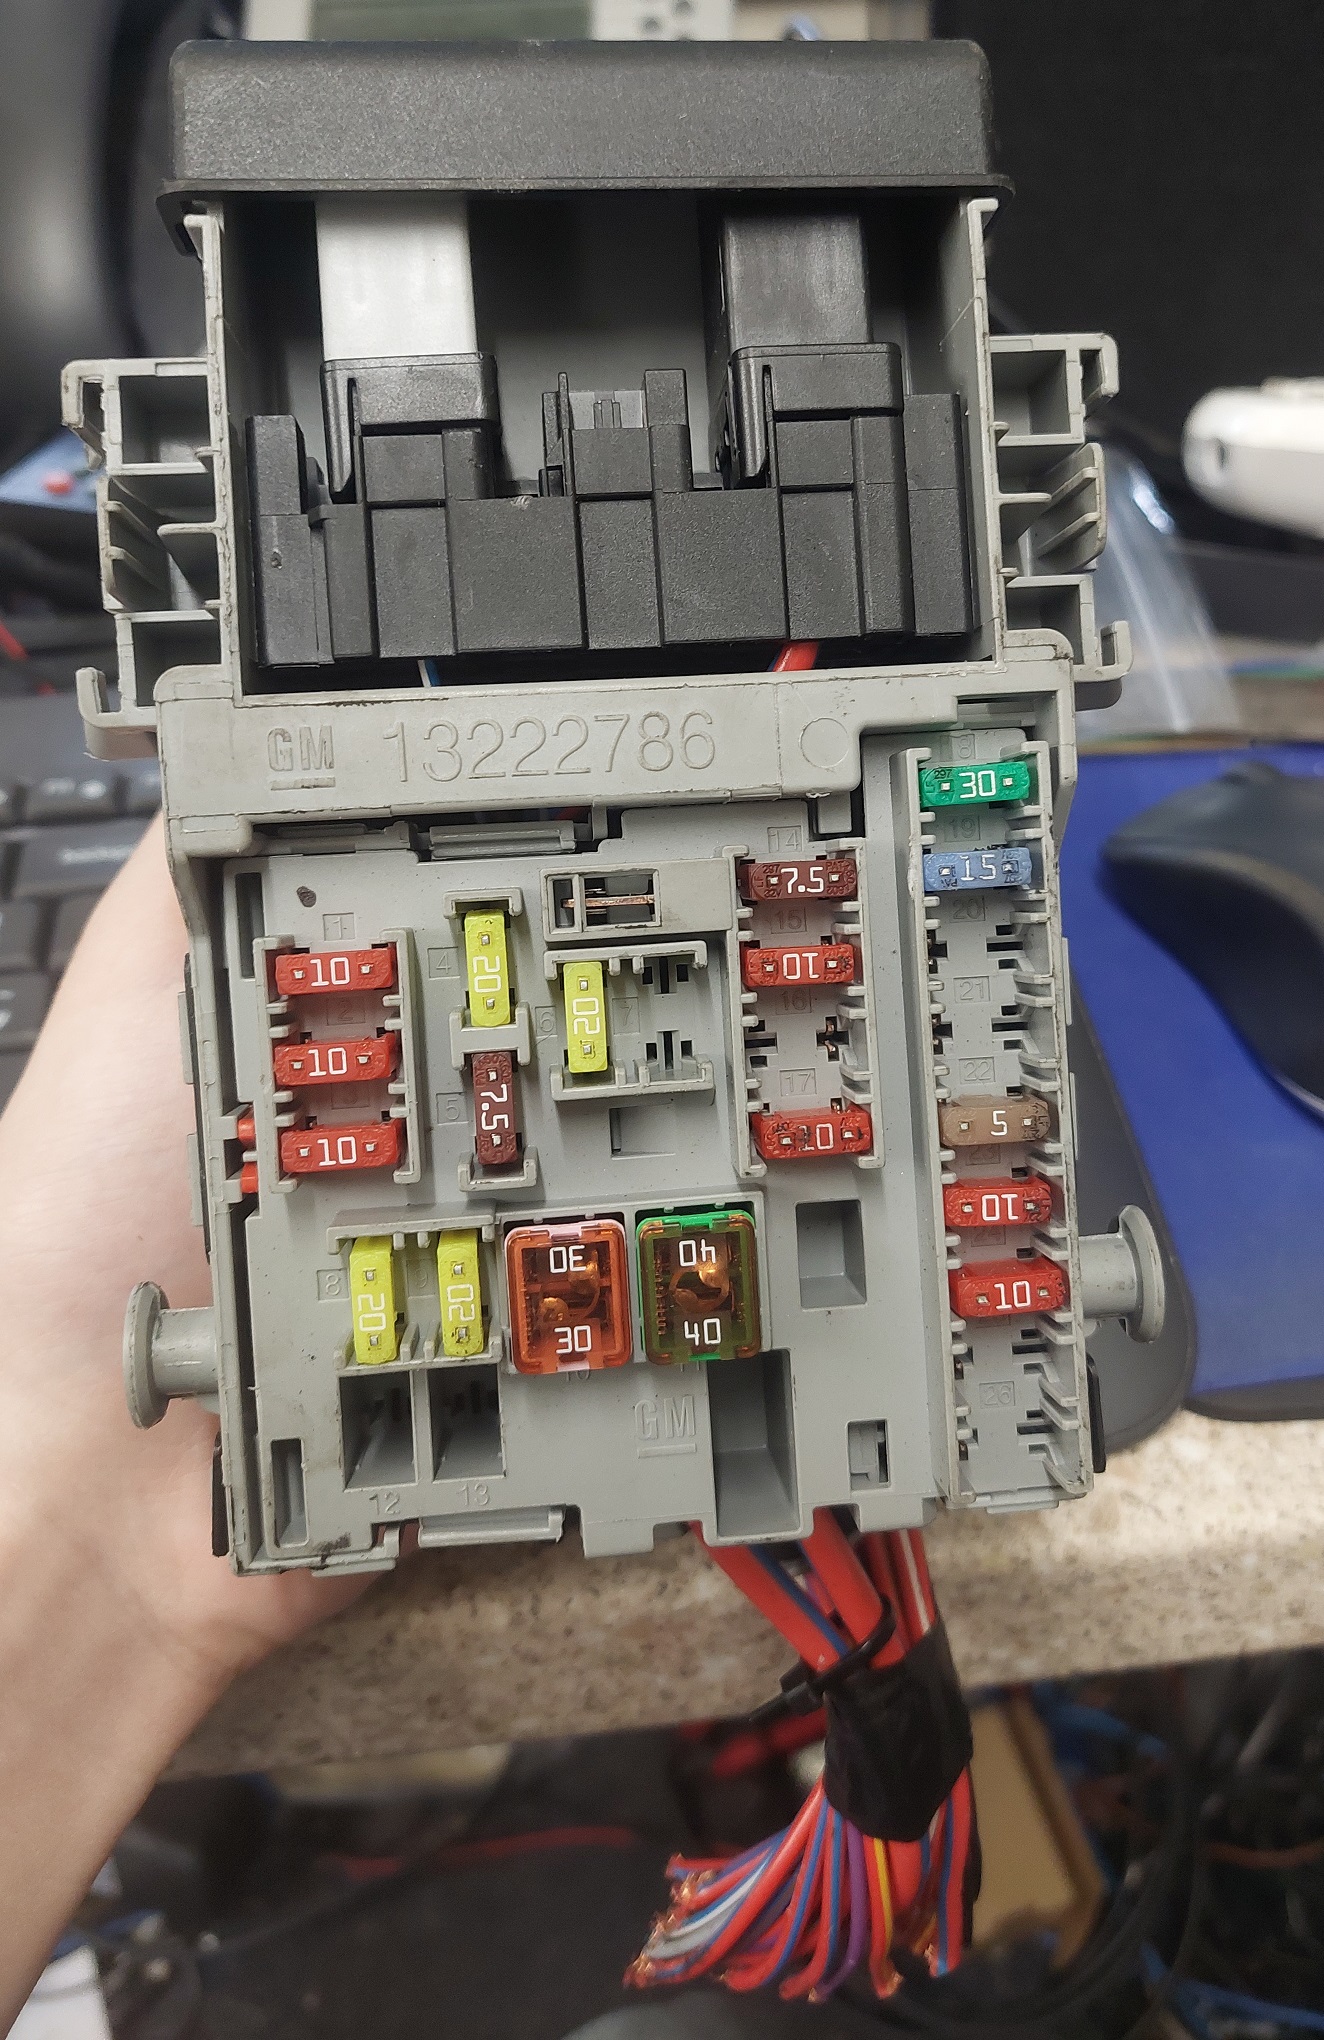
The advantage of having an identical spare unit is I can now dismantle it from the safety of my workbench, and figure out the plan of attack before screwing up the one in my car!
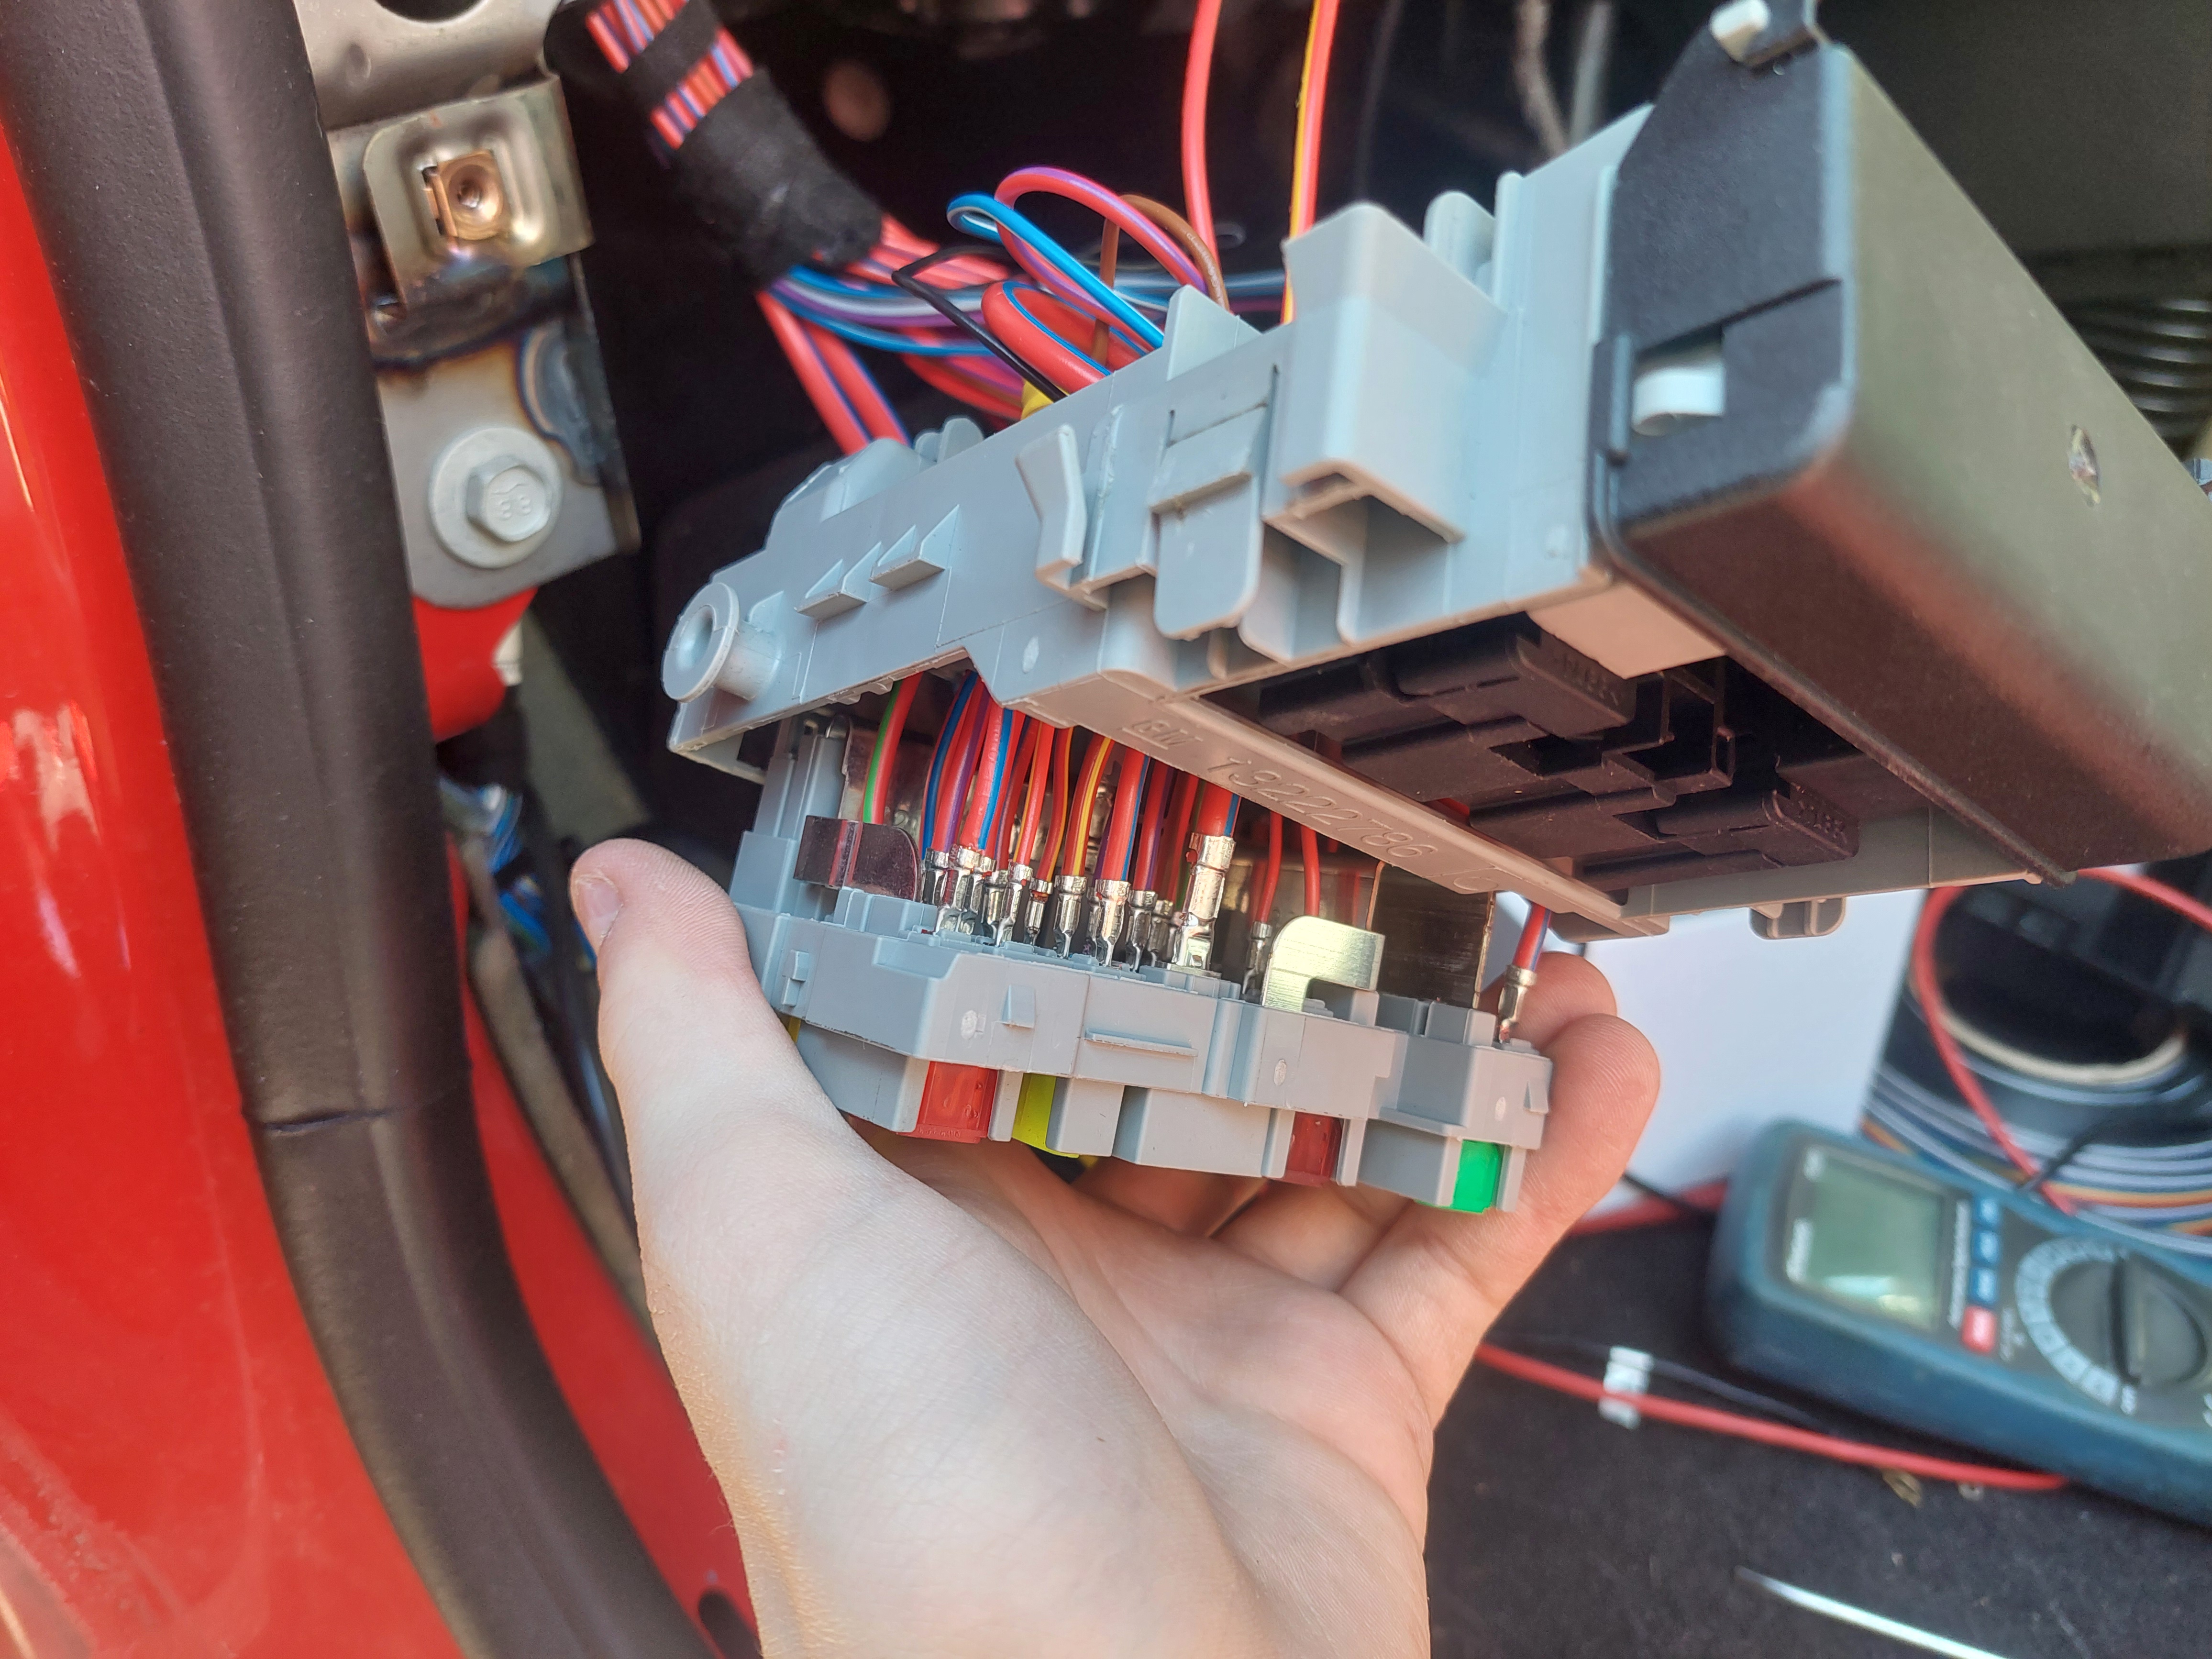
Turns out the fusebox is actually a sort of plastic sandwich, and all the wires need to be pulled through the holes at the rear to reach the contacts in the front. Ugh... This is already becoming much more involved than I'd been hoping. But we've come this far... and I'm well known for pushing ahead with bad ideas...
I managed to retrieve three contacts, and developed a Plan Of Action.
If we look at the front of the fusebox, there are two 'columns' of fuses that are all tied together by a bus which connects directly back to the battery. The far-right column conveniently has a few spare spaces - so that's where we'll get the permanent power.
The 'ignition' power is a bit more difficult, as it doesn't appear on any "busses" in the fusebox. Instead, a permanent supply runs up to a relay, and that switches power directly to the 20-amp fuse in the dead-centre, which powers the accessory socket. So while there's a slot free right next to it, it needs both contacts, and will need "hot-wired" into the relay.
At this point, I decided it would probably be a good idea to disconnect the battery during these activities. I really don't want to short something out while hunched in the passenger footwell. So per GM's instructions I disconnected the battery negative. Being used to mains electric this feels incredibly wrong, but I'm assured this is standard practice.
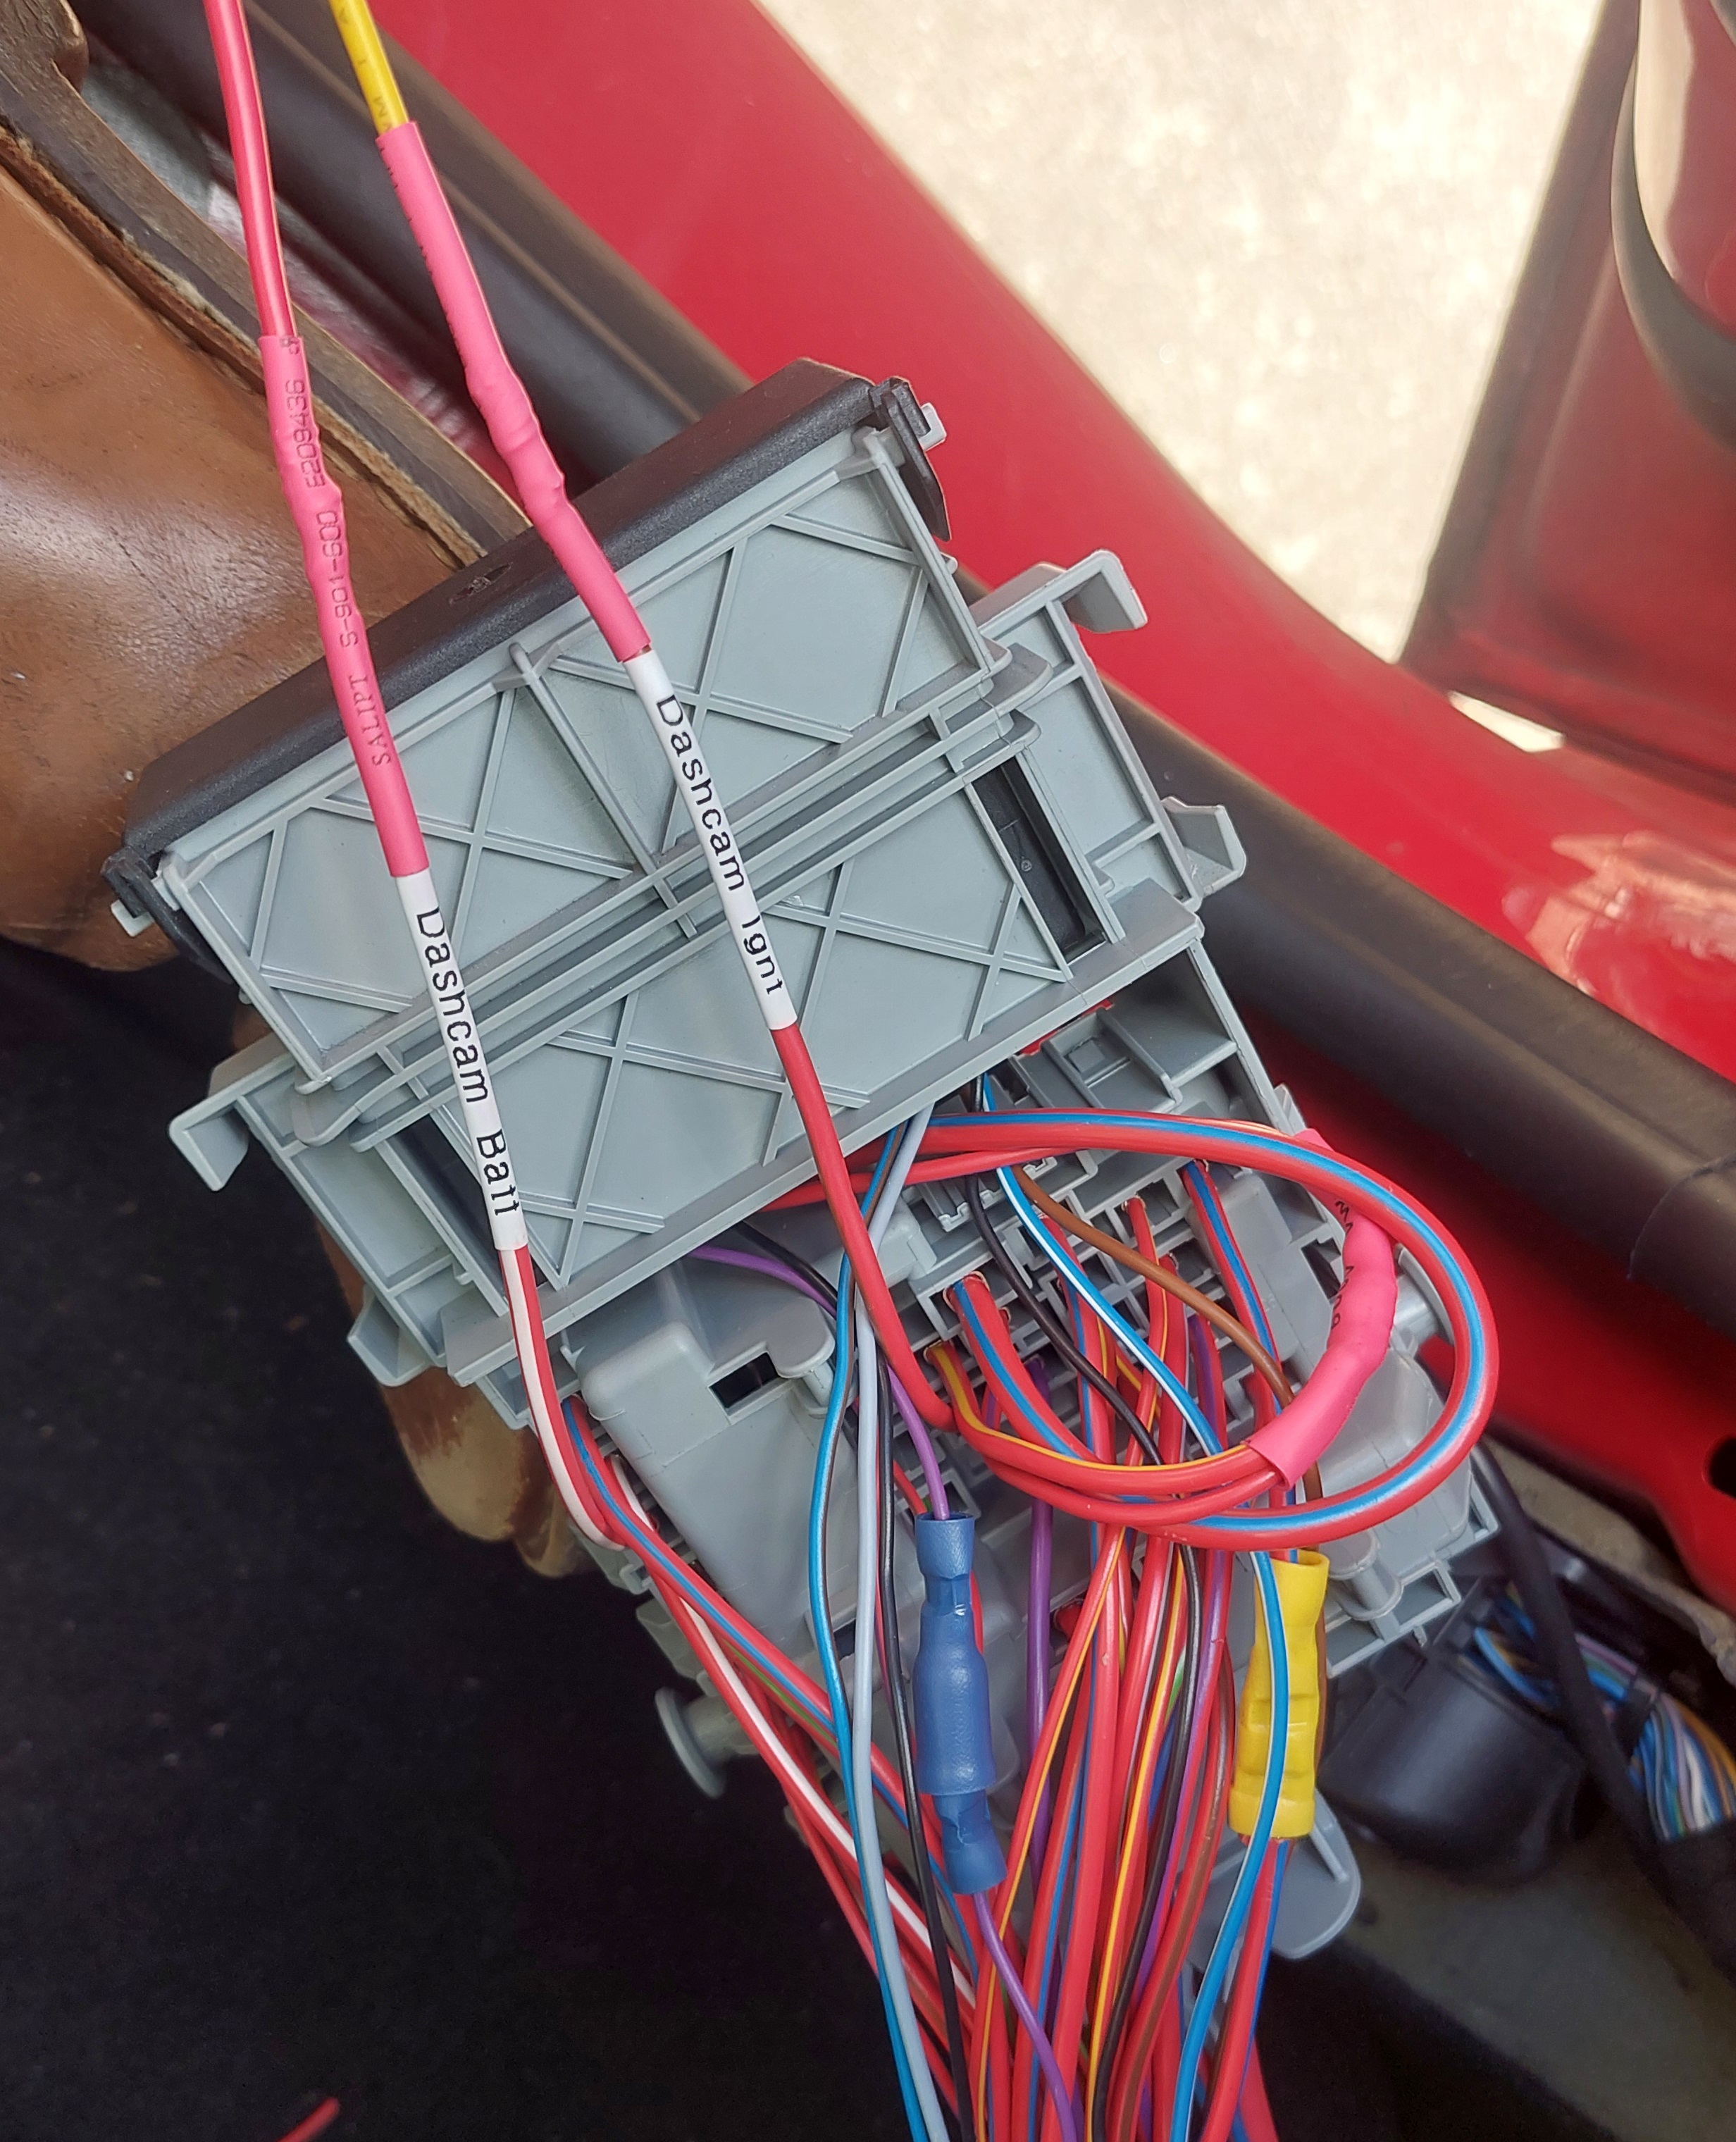
Next, I did exactly what I've just said. Installed my new three contacts into fuse positions 7 and 20, and spliced two of them onto the camera tails. Then I split the wire going from the ignition relay to the fag-socket fuse and spliced on my additional fuse.
I went to a lot of effort to cover up all the splices with heatshrink, and even heatshrink to label up the two camera cables. No ugly insulating tape here, thank you very much!
Finally, it was just a matter of using a few cables ties to loop up the excess cable and hold everything nicely up and out of the way.
I was most relieved to find that with the battery reconnected, everything worked exactly as intended. Starting the car would automatically set the camera recording, and stop it when the key was removed.
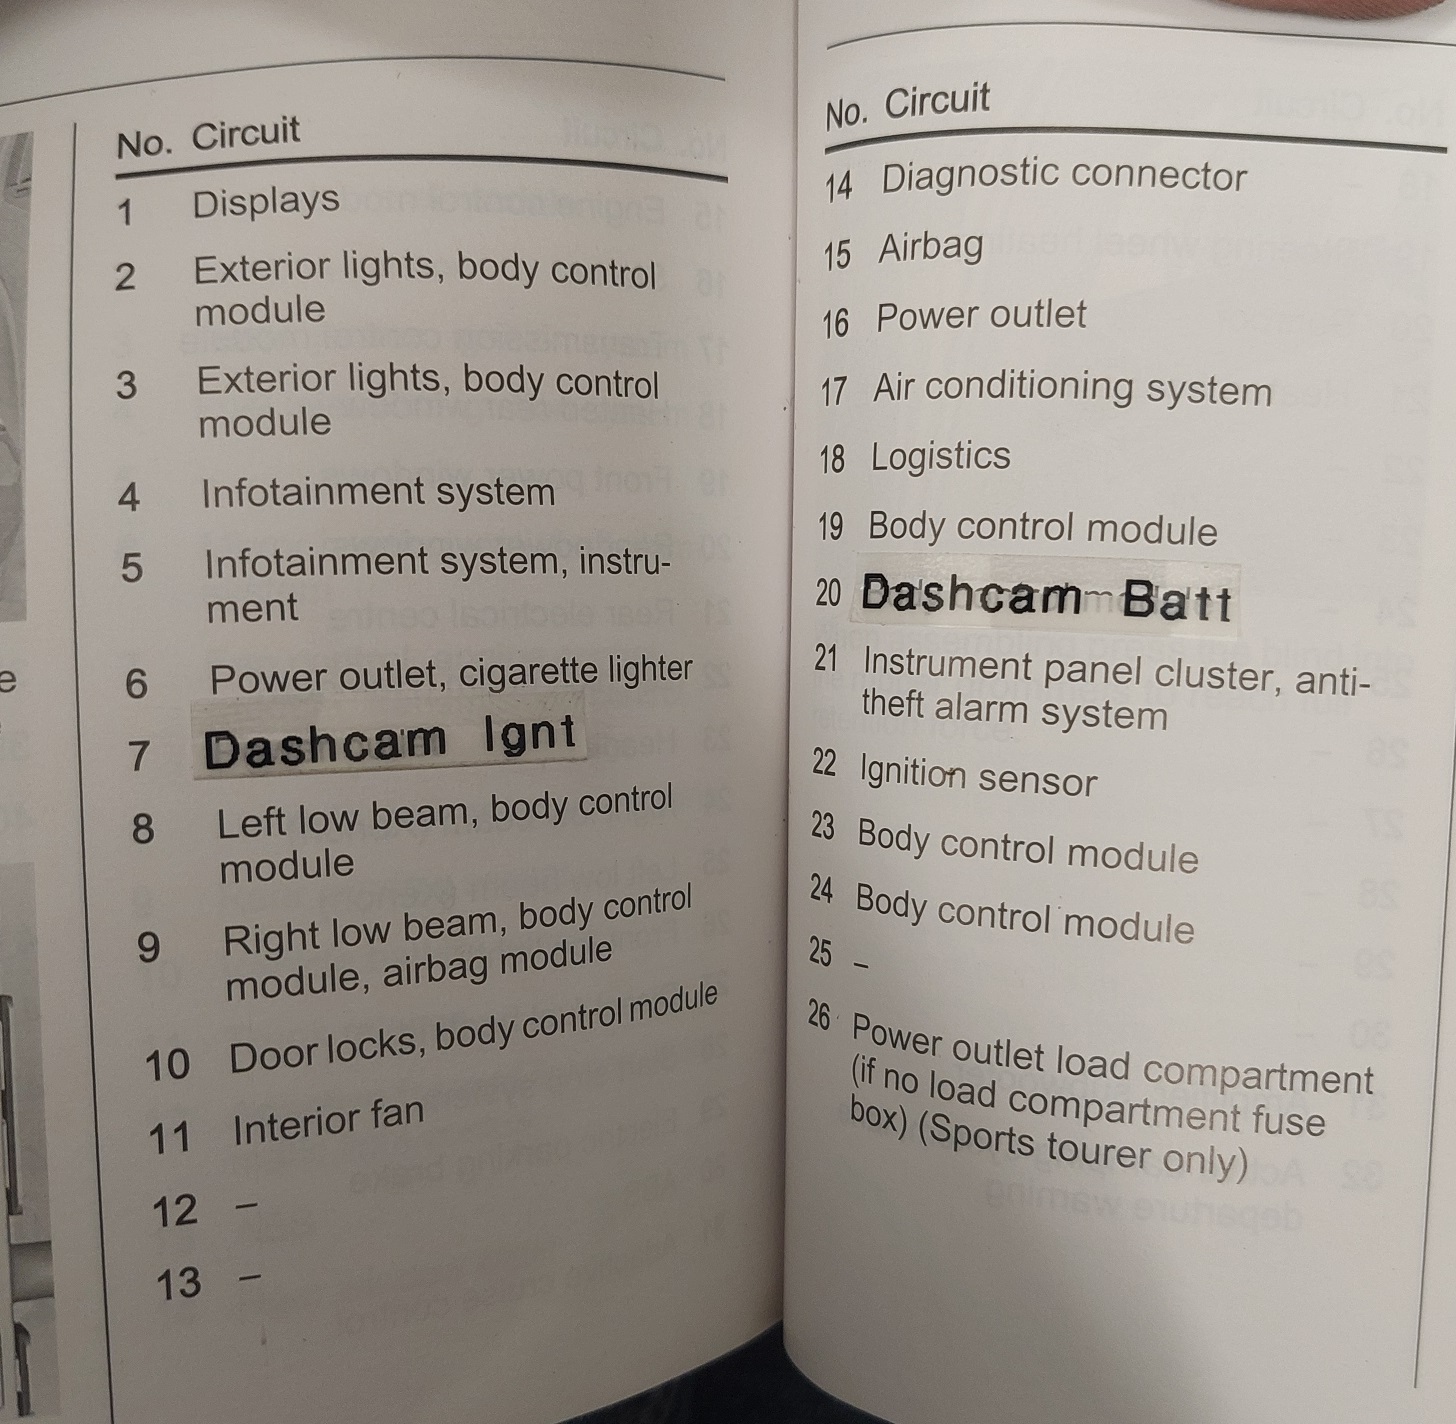
Last job therefore was to put all the trim pieces back in place - and I also made a note in the car's manual about what my new fuses are doing.
- N Dane, May 2025